Saturday, February 12, 2022

Mama Elephant February Stampede Blog Hop


Welcome to the Mama Elephant Design Team blog hop!

Our newest release is now live and available for purchase in the store!

www.mamaelephant.com

I’m very happy to be participating with the Mama Elephant Team as a guest designer for February. This month the the release is all birthday themed and I absolutely love it! I made an effort to make all of my projects with the same color scheme, and it looks so cute together. I can’t wait to share everything with you. Today, I have a card that uses quite a few of the new sets.  
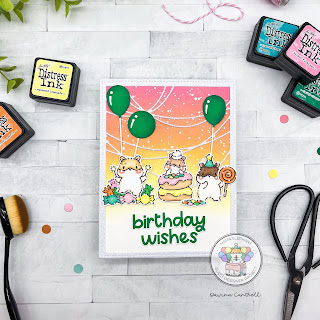
I started by cutting some glittery white cardstock with the new Party Scene Cover- Creative Cuts. My favorite part of this die set is how detailed all the pieces are. I layered this scene over a piece of inkblended cardstock that I splattered with glittery perfect pearls and white ink. I stamped some adorable hamster images from two sets, the new Celebration Hamsters and the previously released Sweet Treats.
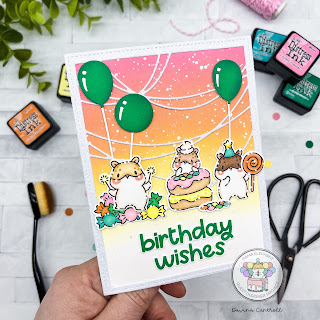
I adhered one of the new Hamster characters on-top of the pile of candy, covering the llama.  Then I built some balloons using the Party Scene dies, making sure to ink the edges for a little visual dimension.  Finally, I stamped the sentiment from my favorite new set, called Wishes Enclosed, with bright emerald green ink and added to the bottom. 

Check out the rest of the hop for amazing inspiration from our Design Team!


To celebrate the new release, Mama Elephant is picking 1 winner to win a prize pack! 


» 1. Leave a comment on the collective Design Team's Instagram Stampede post
» 2. Leave a comment on our Facebook Stampede post
» 3. Leave a comment on any of the Introduction videos on YouTube
 
Each action qualifies for one entry, max 3 entries per stampeder please and good luck!
Open to US entries only.
 
Check out the rest of the hop for amazing inspiration from our Design Team!


Thank you for stopping by! Have a great day from all of us!


Monday, February 7, 2022

Mama Elephant Designer Series- Everyday Monkeys & B2B Rectangles

 Hello crafty friends! Davina here with a sweet monkey filled easel card. I’ve made a few of these unique cards before and I really enjoy them. I like that they are like 3 little cards combined into one. I used images from 4 different stamp sets, and 3 stand alone die sets, to bring this card to life. 


The size of your image panels determines the size of your card. I wanted to use the new B2B Rectangles CC  to create my layers, so I selected the 4th die as my base size. I knew that I could fit 3 on a standard 8.5x 11 piece of colored card, with some room for a border. I selected some old patterned papers from my stash and a piece of coordinating colored cardstock to begin. 


Trim your colored cardstock to 4 3/4 X 10 5/8. Along the length score at 3.5, 6,  and 7.5, then fold the first and third score line in a Z formation. Use a bone folder to get those folds really well. Then fold the middle score line in the same direction as the one right underneath. This will create the easel, and allow the finished card to prop open. Cut some layered panels from decorative paper using the B2B Rectangles CC, and adhere to the first and third sections. You can decorate the center area directly onto the colored card, or add a single piece of patterned paper. If adding paper as I did here, score the bottom portion where it will line up, and only add adhesive to the top and bottom of the panel. It will need some fiddling to open and close properly, but it looks cute both ways.  


I stamped many cute monkeys, heart shaped boba pearls, and strawberries, with brown copic friendly ink, to fill this card. I used images from Everyday Monkeys , Boba Tea , Little Monkey Agenda , and Milkshake.  I colored everything with copic markers before cutting out with the coordinating dies. I made two little Boba Tea mesh shakers for the front top panel using the Boba Shaker Combo CC. The flat mesh shakers are a great way to add some excitement, without a ton of bulk. I simply outline the backside of the window with 1/8 inch scor tape, apply some mesh, then add another layer of 1/8 inch scor tape (trim away the extra mesh after securing with scor tape). After inking the base of the cups, I adhered the heart bobas and a strawberry in each cup and added a little pile of sequins, before closing up the mesh shaker and topping with more goodies. 


For the center area I used some Whimsy Alpha CC die cut letters to spell XOXO, and surrounded with more cute little images. It’s important to make sure that nothing extends over that score line. 


Finally, for the bottom panel I used a large Boba Tea image that also had a cute monkey, but I adhered the hearts on top of the pearls so it matched my shakers from above. I like to make a popped up sentiment to act as a stopper/place holder for the easel portion. I loved the sentiment from Boba Tea, but I stamped the word Cute-Tea,with the large Color Me Letters  stamps, on a white strip that I backed with glittery champagne cardstock and popped onto some foam tape. Now, when I want to display this card it holds itself into an upright position. 


I hope you like this card as much as I do, and that you follow the tutorial to make an easel card of your own! Thank you so much for popping by, Davina 

Friday, January 21, 2022

Mama Elephant Stamp Highlight- Little Postage Agenda

 Hello crafty friends! Today is the final day of the January release Mama Elephant Stamp Highlights. It has been such an honor to participate with the extremely talented Design Team this month and I wanted to thank everyone for all of their encouragement and sweet words. Today we are showcasing the super adorable agenda set called “Little Postage Agenda”. I really love this set and that it has a couple of blank stamps that you can fill with the included words images, or with any of the extremely cute Little Agenda sets. I use these agenda sets so much and love the versatility of the small detailed images. 


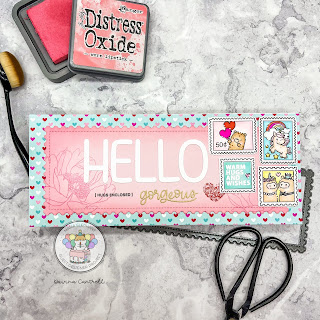
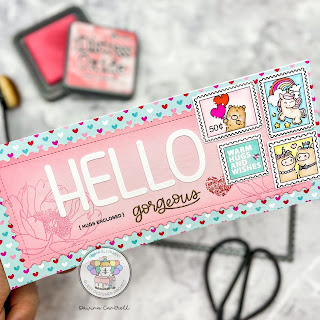
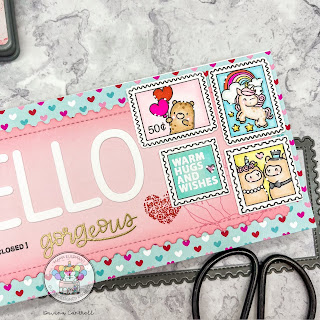
I created a slimline card that I wanted to look like a fancy decorated envelope. I started with some patterned paper that I layered a sweet pink layer on top of. I die cut the pink cardstock with the postage die from the “Slim Film City” creative cuts die set. I gently inked the edges with a pink ink to give some depth, then stamped a pair of large flowers from the “Peonies In Bloom” using pink dye ink. In the center of the layer, I heat embossed the word Gorgeous from the “Scripty Notes” stamps, then cut the word Hello  from white cardstock using the “Whimsy Alphas” creative Cuts. 


I stamped the postage stamps from “Little Postage Agendas” and created two custom stamps. Then I colored them up with copic markers and die cut using the coordinating dies. I arranged the stamps in the right upper corner then adhered the “hello” and stamped a couple of the smaller images from the set in different ink to make it look like it was a savvy traveler with all kinds of stamps and seals. 


This cute slimline ended up being my favorite project of the bunch and I just can’t stop smiling at it. I can’t wait to see what kind of projects you guys create with this release. I will include links for all of the products used below, to the Mama Elephant shop

Little Postage Agenda stamps

Little Postage Agenda Creative Cuts

Slim Film City Creative Cuts

Scripty Notes stamps

Peonies in Bloom stamps

Whimsy Alphas Creative cuts

Little Bear Agenda stamps

Thank you so much for stopping by, please make sure to visit the Mama Elephant Blog to see the inspiration from the Design Team! 

Davina 


Wednesday, January 19, 2022

Mama Elephant Stamp Highlight- Tag Size Greetings

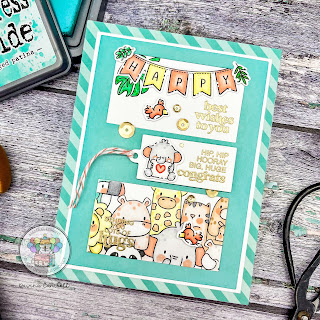
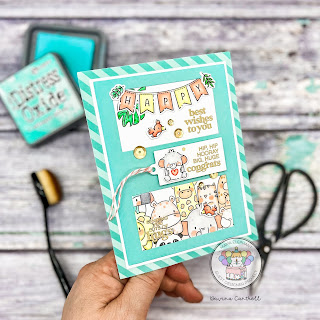
 Hello Crafty friends! I’m back today to showcase Tag size Greetings by Mama Elephant. This sentiment filled stamp set has a greeting for almost any card, and they can be used together or on their own. I made a standard A2 sized card that has several different mini scenes. I created each of these layers and mini scenes using the new B2B Rectangles- Creative Cuts,  and of course, gold embossed Tag Sized Greetings. 


I wanted to create a fun jungle themed card so I chose to use the older The Wild Roar stamp set. I played with an arrangement of smaller rectangles and the center tag die, to find a set up that I felt could accommodate a couple of small scenes. I cut the rectangles out of my aqua layer, then carefully used a pencil to gently mark the openings onto a slightly larger white cardstock layer. 


I masked the lower area and stamped a portion of The Wild Roar into the opening. Then in the upper region I stamped a large leaf from the same set. I colored everything with copic markers and set aside while I worked on my other images. I stamped a banner from Sentiments From A Yeti, and added the letters to spell “Happy” , and also colored a few other small images from The Wild Roar. 


Next, I selected 3 sentiments from Tag Sized Greetings and heat embossed them in gold, onto my scenes and  mini tag. I assembled the layers and popped the tag on top with a twist of twine and a small elephant image that resembled the elephant from the lower area. Then I finished it all with a sprinkling of gold sequins. 

It’s not often that I make this type of card, and I really love how it turned out. It’s like each time you ok at it, you find a different little element to check out. I will add links to all of the products used below from the Mama Elephant Shop.

Tag Sized Greetings

B2B Rectangles- Creative Cuts

Sentiment From A Yeti Stamps

Yeti Banner

The Wild Roar Stamps

The Wild Roar- Creative Cuts

Thank you so much for stopping by, make sure to head over to the Mama Elephant Blog to see all the other great Design Team inspiration.

Davina 

Tuesday, January 18, 2022

Mama Elephant Stamp Highlight- To My Dearest

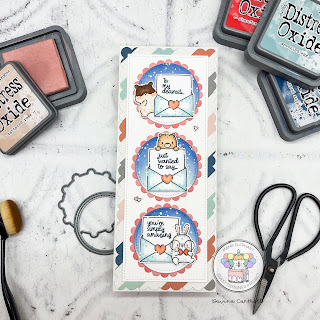
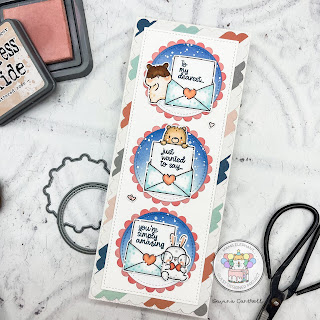
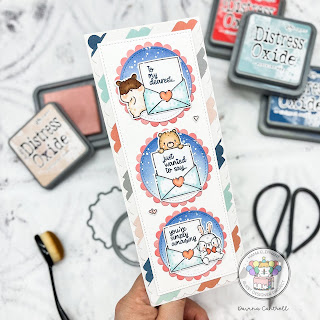
 Hello crafty friends! I’m so happy you stopped by, today we are highlighting the adorable new set called “To My Dearest”. I created a soft slimline card that also features a new die set, called “Combo Circles- Creative Cuts”. 


I started by cutting a scalloped panel for my base layer, from striped patterned paper. I used the “Slim Card Basics-Creative Cuts” set for the scallop and for the smaller stitched panel that is layered on top. Next, I cut 6 scalloped circles from a soft coral cardstock. I gently inked around the edges of 3 of them, then layered alternating pairs of scallops to make full scallop circles. I used the stitched circles in the appropriate size, to adhere to center after inking them a deep blue and gently splattering. 


I stamped and copic colored the cute envelope images, before cutting them out with the coordinating creative cuts. Then I added small white dot highlights before glueing them onto my inked scallop circles. I arranged the 3 scalloped images onto my slimline before adding two small little hearts from the set. 


Normally, I’d go overboard adding all kinds of images and sequins etc., but this sweet slimline felt complete, and I was really smitten with the simplicity. I hope you like my card as much as I do. I will add links to all of the Mama Elephant products used below. 

Slim Card Basics- Creative Cuts

To My Dearest

To My Dearest -Creative Cuts

Combo Circle - Creative Cuts

Thank you for stopping by, make sure you visit the Mama Elephant Blog to see all of the amazing inspiration from the design team,

Davina 


Monday, January 17, 2022

Mama Elephant Stamp Highlight- Everyday Monkeys

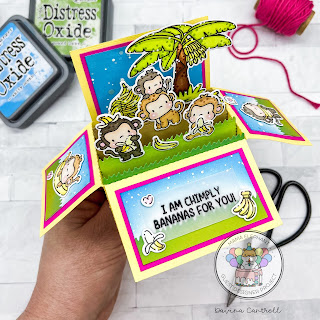
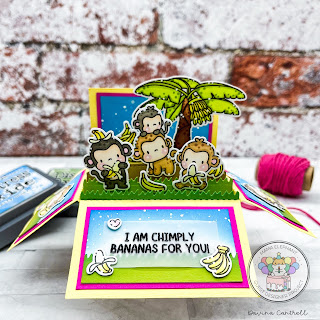
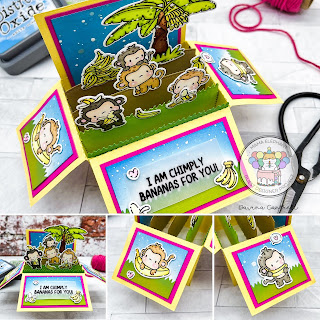
Hello Crafty friends! I’m back today with a card using the new Everyday Monkey Stamp Set and coordinating Creative Cuts from Mama Elephant. I love these cute monkeys so much that I decided to create box card so I would have room for every single stamp on one project. 


This box card was a snap to make using the Mama Elephant 3D Pop Up Card- Creative Cuts. I selected some pretty spring plaid patterned paper to adhere to the outside, and for my color inspiration, but I didn’t manage to get a photo with the paper visible. I assembled the box card with a soft yellow cardstock and added inkblended panels and inserts using the included panel dies.


Next I stamped all of the images onto bright white Neenah cardstock, and colored everything with copic markers before die cutting with the coordinating CC. I grabbed a sweet little word bubble from the Little Bear Agenda set, but other than that, all images are from the Everyday Monkeys. I heat embossed the sentiment onto some vellum for the front flap, and hid the glue under some small images. Then I arranged all the cuties onto my inserts making sure everyone was visible from the front. That banana tree is really beautiful and I wanted to make sure it was not covered up! 


These little monkeys are a wonderful size for all kinds of cute scenes and I can’t wait to share more with you. I will add the links of all products used to the Mama Elephant Shop and don’t forget to check out the Mama Elephant Blog  to see even more inspiration from the Design Team

Everyday Monkeys

Everyday Monkeys Creative Cuts

Little Bear Agenda

3D Pop Up Card- Creative Cuts

Thank you so much for stopping by,

Davina 


Saturday, January 15, 2022

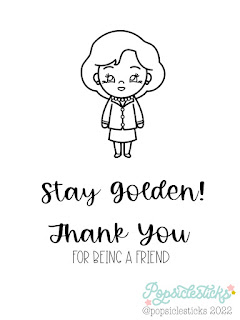
Betty White Freebie Digi

Hello crafty friends! It’s not often that you will find me here, on my sadly neglected blog, but I wanted to share a digital stamp that drew. Last night I was inspired to put together an easy to color image of the late great Betty White. January 17th will be her 100th birthday and it is a shame that she couldn’t hold on a few more days. But her bright smile and quick wit will remain with us for all time. 


I created this image in a size that will work well with much of your existing physical stamp collection. You can see here that I used several images from several LawnFawn sets to accentuate my mini slimline card, as well as a couple LawnFawn die sets.  


I am especially moved by Betty White’s love of animals and her contributions to many animal societies over the years. In her honor, I will be donating to The Pug Queen, who sacrifices her time and energy into rescuing and saving Pugs worldwide. Please consider contributing to an animal conservation of your choice if you are able to. 


This Betty White “Stay Golden” digital stamp is free for anyone who would like to make a friendship card, or project. All I ask is that if you post it to please tag me so that I can see your project and 💕 it. This set is sized at 3x4, which means that when you print it up, print it at that size for best results. I’ve never offered a freebie before, and I’m not fully familiar with all of the ways to offer it with maximum results. I will give some simple instructions for those unfamiliar with digital stamps,

1. Save this jpeg image 

2. Import image to a word/pages type document. 

3. Size at 3x4

4. Print, color, and cut out ☺️

Thank you so much for stopping by,

Davina @popsiclesticks