Monday, March 11, 2019

Bambi Inspired Lawn Fawnatics Challenge #48


I’ve got a third and final project that I am sharing today over on the LawFawnatics Challenge blog. I am trying to create a project everyday during the duration of this two week challenge, but there were 3 “official” cards that Lawn Fawn shared.
 I love creating scenes from movies and books. When I am going through my stamp sets I’m always thinking about what else I can create with the images. I was inspired by one of my favorite childhood movies Bambi. I knew that I had the images for all of the main characters, but my favorite part of the movie is the “Twitterpated” spring, and I tries to recreate the meadow scene.
 I began by die cutting my main panels pieces andink blending with distress oxide inks, then splattering white opaque ink onto my golden sky. I stamped out all of my images from Neenah solar bright white card stock and colored them with COPIC markers and white gel pen highlights.  I wanted my cute Flower the skunk to be behind the flowers like he was in the movie, so I popped the flowers and grass up on a foam tape and placed him behind. Thumper sits atop the log from the Toadally Awesome set, Bambi is standing in front. I didn’t forget owl who is perched on a branch whistling away. It was such a joy to create this iconic scene and I hope that you play along with the current challenge to create your own.

Items used:
Scalloped layered dies
Stitched frames
Grassy meadow die
Stitched hillside
Mom and me
Yay kites
Toadally Awesome
Simply celebrate
My lucky charm
Stinking cute
Winter sparrows
Cheery Christmas

Honeydukes sweet shop Lawn Fawn card

Happy Monday! I know that Monday’s aren’t considered happy, but since I have another card to share on the LawnFawnatic Challenge blog I am pretty excited. The current challenge is inspired by a book, movie, or song. These are all of my favorite things to make scenes about!

I created this Honeydukes Sweet Shop inspired card with the thought that if I was visiting Hogsmeade Village in the Wizarding World my pockets would be bursting with goodies. I tried to recreate all of my favorite treats using all Lawn Fawn stamps and dies. I would have Bertie Bott’s Every Flavour Beans and Chocolate Frogs. There would be Droobles Best Blowing Gum and Fizzing Wizzbees. I would have brought home a Pumpkin Pasty for later and some sweet Jelly Slugs.

I used many sets to create this scene, I think I used 16! The large box of Bertie Bott’s Every Flavour Beans was made using Flirty Frames as a window with all of my delicious How you Bean Jelly Beans showing through. I recreated the box front with the fancy banner from Bannertastic, and topped the window with the little boy from Screen Time. I used a red Copic marker to make the lines on the box shape to make it look as close as possible to the authentic package.
For the Chocolate Frog card, I wanted to keep the the items cooking consistent so I used a smaller Flirty Frame to frame the little witch from Costume Party. Then I used a ruler to draw a hexagon shape around the frame and colored it up. I used the super cute frog from Critters Ever After for the actual chocolate frog which I popped up on foam for a 3D look.

My Pumpkin Pasty is the cupcake from Sweet Friends topped with the whipped cream from Thanks a Latte and a cute pumpkin from Happy Harvest. I made sure to give the wrapper the pink and green colors of the Honeydukes sign. I then colored up some pink Fizzing Wizzbees using the cuties from Little Fireflies, and a purple Drooble gum ball is a circle from Let’s Bokeh. I stamped the smaller snail from Gleeful Gardens that I carefully masked the shell off of to make my green Jelly Slug, who is creeping across the bottom. And finally my Honeydukes banner is simply created using Smittys ABCs and Sentiment Banner dies.

I layered all of my treats across a light pink inkblended background that I mounted on pink striped lawn Fawn patterned paper and lime green cardstock. I was so happy with how this large 5x7 card turned out and with how yummy everything looks. I can’t wait to get back to the Wizarding World and experience these treats in real life.

I hope you participate in this challenge and thank you for stopping by,
Davina

Monday, March 4, 2019

Lawn Fawn Challenge 48- Inspired by a Book, Movie, or Song


Hello everyone and thank you for stopping by. Today I am so honored and excited to announce that I am guest designing on the amazing Lawn Fawn Lawn Fanatics Challenge Blog. This current challenge is Inspired by a Book, Movie, or Song. And let me tell you that is right up my alley since most of the projects I create are movie/show inspired scenes.


I know it’s a shocker that I didn’t start off with a Harry Potter scene but I wanted to make something that I knew everyone would be familiar with. I created this tall slimline Peter Pan inspired card using all Lawn Fawn stamps and dies. It is truly amazing that their entire product line works so well with each other. I used about 8 different stamp sets and several border dies to achieve this look, along with distress oxide inks, Copic markers, and lots of adhesive. 

I love the extra real estate you get on these tall 8.5 x 3.5 card bases. I created the main image panel with several layers of cardstock all trimmed to 8.25 x 3.25 inches wide. I temporarily added several pieces of washi tape to my trimmer to ensure that all of the layers were the exact same width. Starting from the top of the scene I die cut the various layers beginning with the ocean waves, then beach, Mermaid Lagoon, and finally the grassy hill. I then arranged these panels on the base layer to achieve my desired look then trimmed of the extra length from the bottom. 
I ink blended on each layer to my desired look making sure to go go beyond the next layer. Then I took a small round paintbrush and flicked first clean water, followed by white opaque ink on all of the layers except the grassy hill. I put those aside to dry.

Using all the paper I trimmed off of my layers I got to work stamping my images with my stamp platform. I really needed dark crisp lines to let my colors pop. I colored each of my images with Copic markers and highlighted with a white Jelly Roll pen. Using the coordinating dies I cut out all of my images including an additional Peter and Tinkerbell from fun foam. I like to cut those early to let them poof back up after being run through the sizzix. Then I glue them to the colored image using Ranger matte medium and place an acrylic block on top to let them dry flat and sturdy. 

I created Skull Rock with with the quote bubble from Love Letters. I colored the eyes and nose with Copic markers and layered the rock clusters from Ahoy Matey in front to achieve the pirate lair. 

For Peter, I used the little boy image and flowing tie from Bicycle Built for Two, but I used a Santa hat from Happy Howlidays to create the cap. I selectively inked the hat, masking off the pouf, before stamping and die cutting. Then I used a Copic multi liner to draw the top of the cap, and trimmed off the extra. I turned the tie upside down for the feather. 

After assembling my images and layers using the lawn Fawn glue tube I popped the grassy hill up with foam tape to give it a 3-D look. I tucked in my willows and finished by putting Peter and Tinkerbell onto the scene with a more “flying” appearance since they were mounted on the fun foam. I attached the card front onto the base using double sided sticky tape. 


It was a dream to be asked to participate as a guest designer and certainly hope that you enjoy seeing how I made this card. I will have a couple more inspired cards to share next week as well so please check back in. 
Items used:
Lawn Fawn Glue Tube
Mermaid for You
Bicycle Built for Two
Wild for Tou
Ahoy Matey
Toadally Awesome
Love Letters
A Little Sparkle
Happy Howlidays
Stitched waves & Hills Borders
Ocean Waves Die
Meadow Die
Foam Tape Copic Markers
Distressoxide Inks

I hope you enjoy this card and play along with the current challenge!
Davina


Sunday, March 3, 2019

Lawn Fawn Fairy Valentine

Hello. I know that Valentine’s Day has come and gone,  but back in early February when I made this slimline tall card I had every intention of making a blog post about it. Obviously I didn’t, but I’m going to play catch up, and make an effort to post at least twice a month. Then maybe I will become more comfortable and the process will get easier for me.
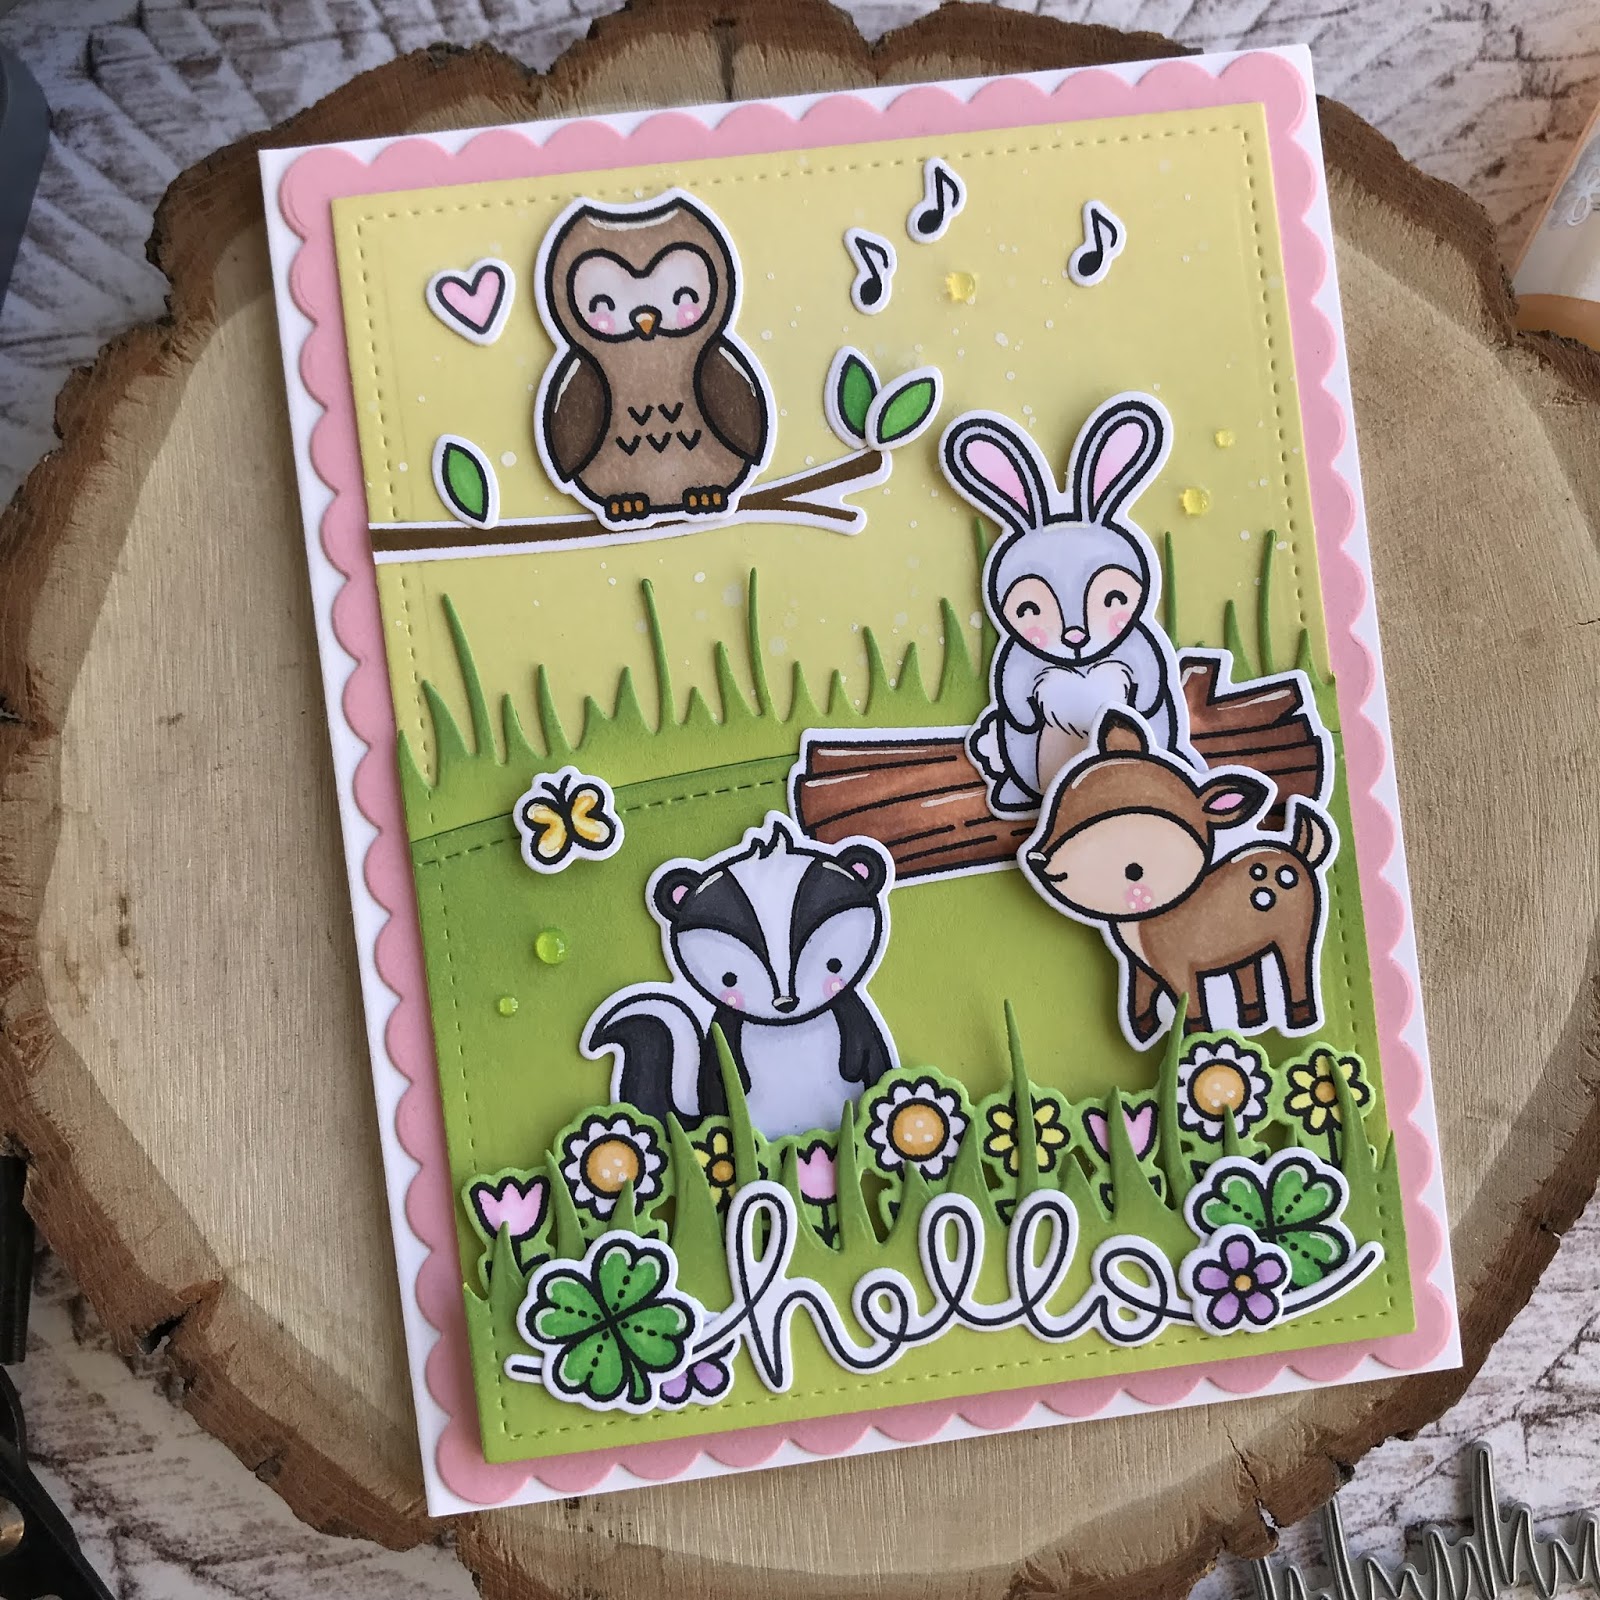
I used all Lawn Fawn stamps and dies for this card. Before I started stamping, I drew a very rough sketch on a piece of scratch paper. That way I would have an idea of what I would be trying to create. I’ve found that this is the easiest way for me to stay on track when creating a complex scene. Otherwise I just get distracted. 
Taking two sheets of Neenah solar bright white cardstock, I got to work. I trimmed 4 inches off the shorter end of  one sheet, then scored and folded to create my card base of  3.5 x 8.5. I trimmed the remaining piece to be 3.25 x 8.25, this will be the card front. I also cut down my second sheet into manageable sized pieces to stamp on and create my other snowy layers. I always carry my layers all the way to the bottom so on any layered card of mine if you look carefully at the side you can count the layers like tree rings. On this card, I chose to cut my two layers of snow drift from one piece and carefully realigned them before adhearing. I am a paper hoarder and always do my stamping on any smaller leftover pieces. Waste not... want not. I am a responsible crafter 😂🤣

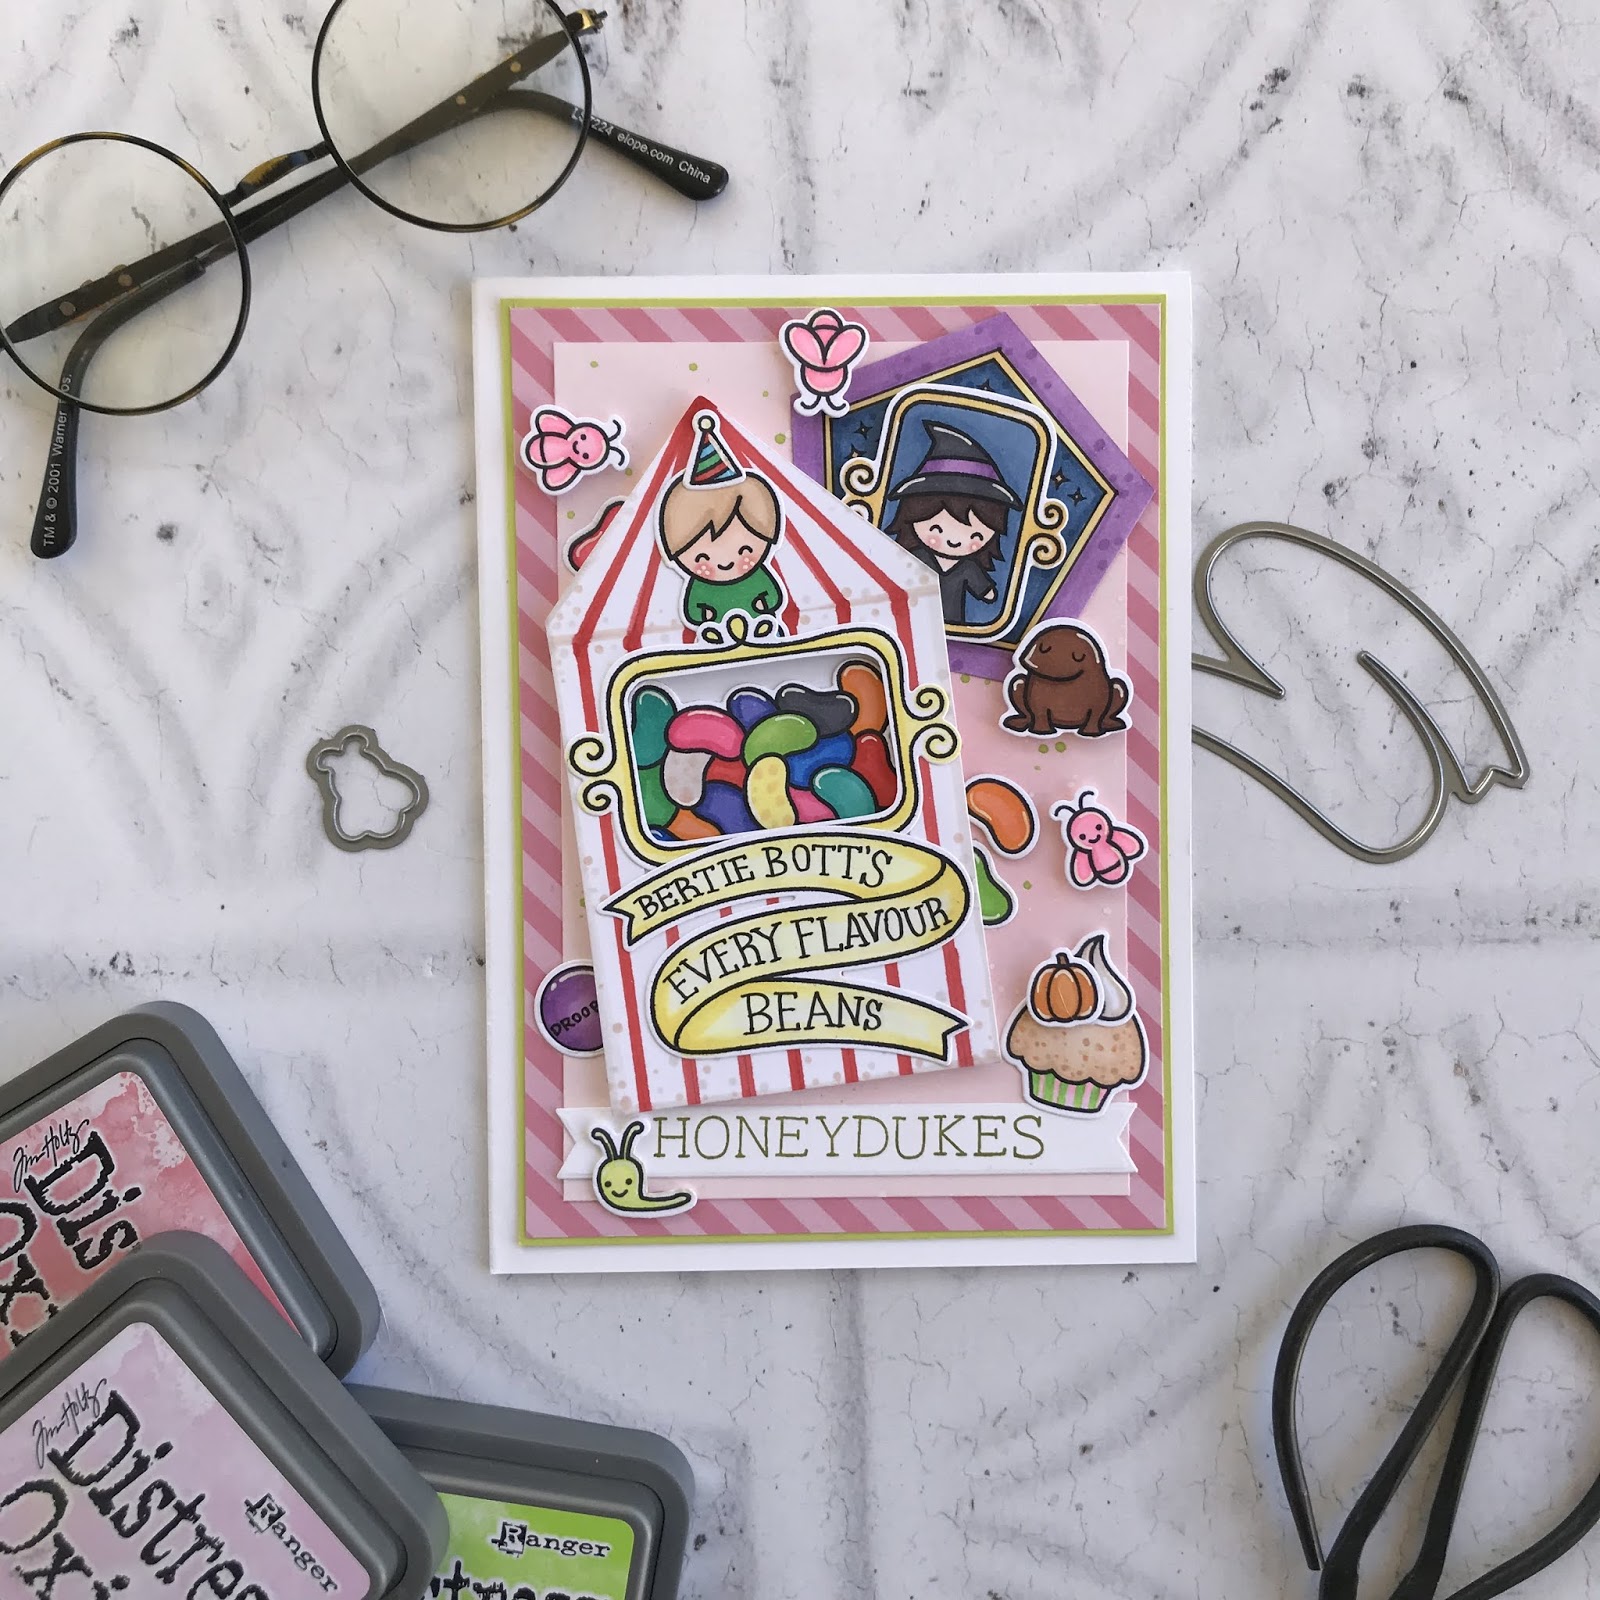
 Using my stamp platform is a must. I don’t know how I lived without it. But I stamp each image at least two or three times in order to get a very dark crisp image, so I have to let the images dry completely before coloring to reduce the chance of smearing. After stamping, I worked on my ink blending with distress oxide inks. I used spun sugar and pickled raspberry for the sky, and tumbled glass (very sparingly) on the snow. Next I splattered with clean water, then with watery opaque white ink, and followed up with gold ink. 
I used simple Copic coloring with two colors on each image (3 on the House) and highlighted with a white gel pen. With the coordinating dies I cut out all of my images, I also cut out the two fairy shapes from a sheet of fun foam. I like to cut it early in the project so it has time to fluff all up again after going through my sizzix machine. Then using Ranger matte medium, I glue my colored pieces onto the foam, then lay an acrylic block on top assure that they dry flat and in place. Put these aside til later. 

Now the fun part... assemble! Lay everything out first to find the desired locations, then carefully glue using the adhesive of your choice. I use 3 or 4 different kinds on any one project. Lots of double sided tape, lawn Fawn glue tube and matte medium. I also like dimension and for my images to pop, so I  use foam tape, glue dots and my secret ingredient, hot glue 😳 I can’t believe I just admitted that haha. But since nobody reads this then oh well. I use the hot glue on most of my die cut images because I like the lift it has off of the base and I can lay an acrylic block to smoosh it to my desired location and make it level. If you actually do read this, then please be careful and don’t go crazy without practicing. It’s messy and can leak out of the side and ruin your card. And it’s a one chance thing. Once it’s on, it’s there to stay. After I get all the images on, I trim off any over hanging pieces like the branches and berries. 


Finally I attached my Fairies using the adhesive backed foam and added my heat embossed sentiment. I adhered my card front to the base with 1/4 double stick tape and finish off with the jewels. 

I really love making these tall slimline cards, there is just so much more room to create on and the scenes can really come together well. 


These are the supplies I used and the stamp sets that I combined to create this wintery pink scene. Thank you so much for stopping by,
Davina