Tuesday, June 21, 2022

Pretty Pink Posh June Release

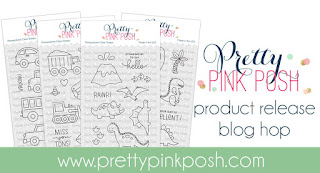
Hello crafty friends. Davina here, “ Stomping by”, with a fun dinosaur filled slimline card using the amazing June Release. There are two new dinosaur sets full of the cutest images and accessories. I used both Dinosaur Friends and Dinosaur Additions to create this card. 


I stamped and colored my images with bold primary colors, before using the coordinating dies to cut out my pieces. Next, I used a large stitched slimline die to cut layers for my background. I inked the layers and background using distress oxides in bold bright colors. Then I used Ranger Grit Paste and the Dinosaur Layer Stencils to emboss the footprints into my shorter layers. 


I arranged the images onto the layers, and adhered them throughout, after stamping a sentiment toward the bottom, with the addition of the new “Hello” word die. Once everything was in place I finished it off with some sparkling sequins and layered it onto a red card base. 


I had so much fun creating with the new playful release and I can’t wait to see what you come up with! Thank you for “stomping” by,

Davina 

Friday, June 17, 2022

Pretty Pink Posh June Blog Hop


Hello crafty friends! I’m so happy to be participating in the June New Release Blog Hop with Pretty Pink Posh. This release is so special and fun as it was inspired by their incredibly sweet son, and all of his favorite things. I am so tickled by these adorably cute dinosaurs, cars, and truck sets. 


I used the wonderful Construction Trucks set for this card. I wanted it to look like a scene in the yard where toys were abandoned at meal time. I inked a bright blue sky and embossed stars by using the Dino Dig Stencil. I mixed a few drops of a yellow copic reinker into a teaspoon of white embossing paste to get those bright yellow stars. Then, I heat embossed my sentiment into the open area.  Next, I cut a grassy layer that I stenciled the road onto by using the Layered Roads 3 piece Stencil and more of the yellow embossing paste for the dashes. Before adhering the grass with foam tape, I used a random blobby die to cut a “hole” in front of where I wanted my tractor. I inked the background brown under the area so it had depth. 


Finally I adhered my construction images and little cute cones throughout my scene and finished with a few sequins before layering in onto some blue patterned paper. 

Hop along during the 3 day blog hop, leaving a comment at each stop, for your chance to win one of 3 $30 gift certificates to Pretty Pink Pink. The comments will be open until 6/23/22 at 11:59 pm. Winners will be announced on the Pretty Pink Posh Blog

BLOG HOP DAY 2: 
Davina Cantrell (you are here) 

Friday, June 10, 2022

Magic Shop Signs by Popsiclesticks

 Hello crafty friends. I hope you are here to download a pdf of the Magic Shop Signs. I was so happy to create my Photopolymer Clear Stamps. Due to copyright infringement I could not put the proper and desirable shop names onto the stamps. But I have created a document that has the sign names for you. 

1. Stamp and color your images. Cut out by hand or using a scan n cut. 

2. Print this document using your favorite white cardstock on either a Laser or Inkjet printer. (The same paper that you use to stamp) This is an 8.5 x 11 sized document. Do not resize or fit to screen. Each sign is sized to be adhered directly on top of the blank sign. Color and cut out the signs you need. I have all the signs separated into sets and labeled. 

3. This is how I have always used these images  the dimension looks great and I think you will like it. I put three sets on one page so you are not always having to print stuff up. 

4. I included some of the word bubbles. Those teeny letters don’t always stamp clear. That was my mistake and I apologize. The small word bubbles from many other brands fit into these bubbles as well so feel free to play around with your available sets! 

Here is an example of two of my cards using this technique,


Please download the files and enjoy! Thank you, Davina 💕