Monday, August 27, 2018

Hello everyone. I know I said the other day I would share a little about how I made my lawn Fawn village stamp sets into Hogsmeade. It only takes a little imagination and a lot of patience to execute most ideas. This is something I had wanted to do for a while and just kept saying next time. But once I did it I fell in love.

This is an A2 sized version of the larger shadow box card I shared last week. And once again I used all LawnFawn products to create it. I created a short cut for myself though, and I made some tiny digital images of my magic Harry Potter elements so that I don’t have to hand draw them each time I remake this idea.

So I sized these to fit on top of the village shops and homes. And in the future I know I will play around with additional storefronts. I put a whole bunch on one layout so I could print out 12 of each design on one piece of Neena Solar White. I ran it through my scan and cut, which I don’t use very often, but I had put a new blade and I was fairly happy with the results. Now I will have a whole bunch of card candy, and it will only need minimal trimming and cleaning up. 

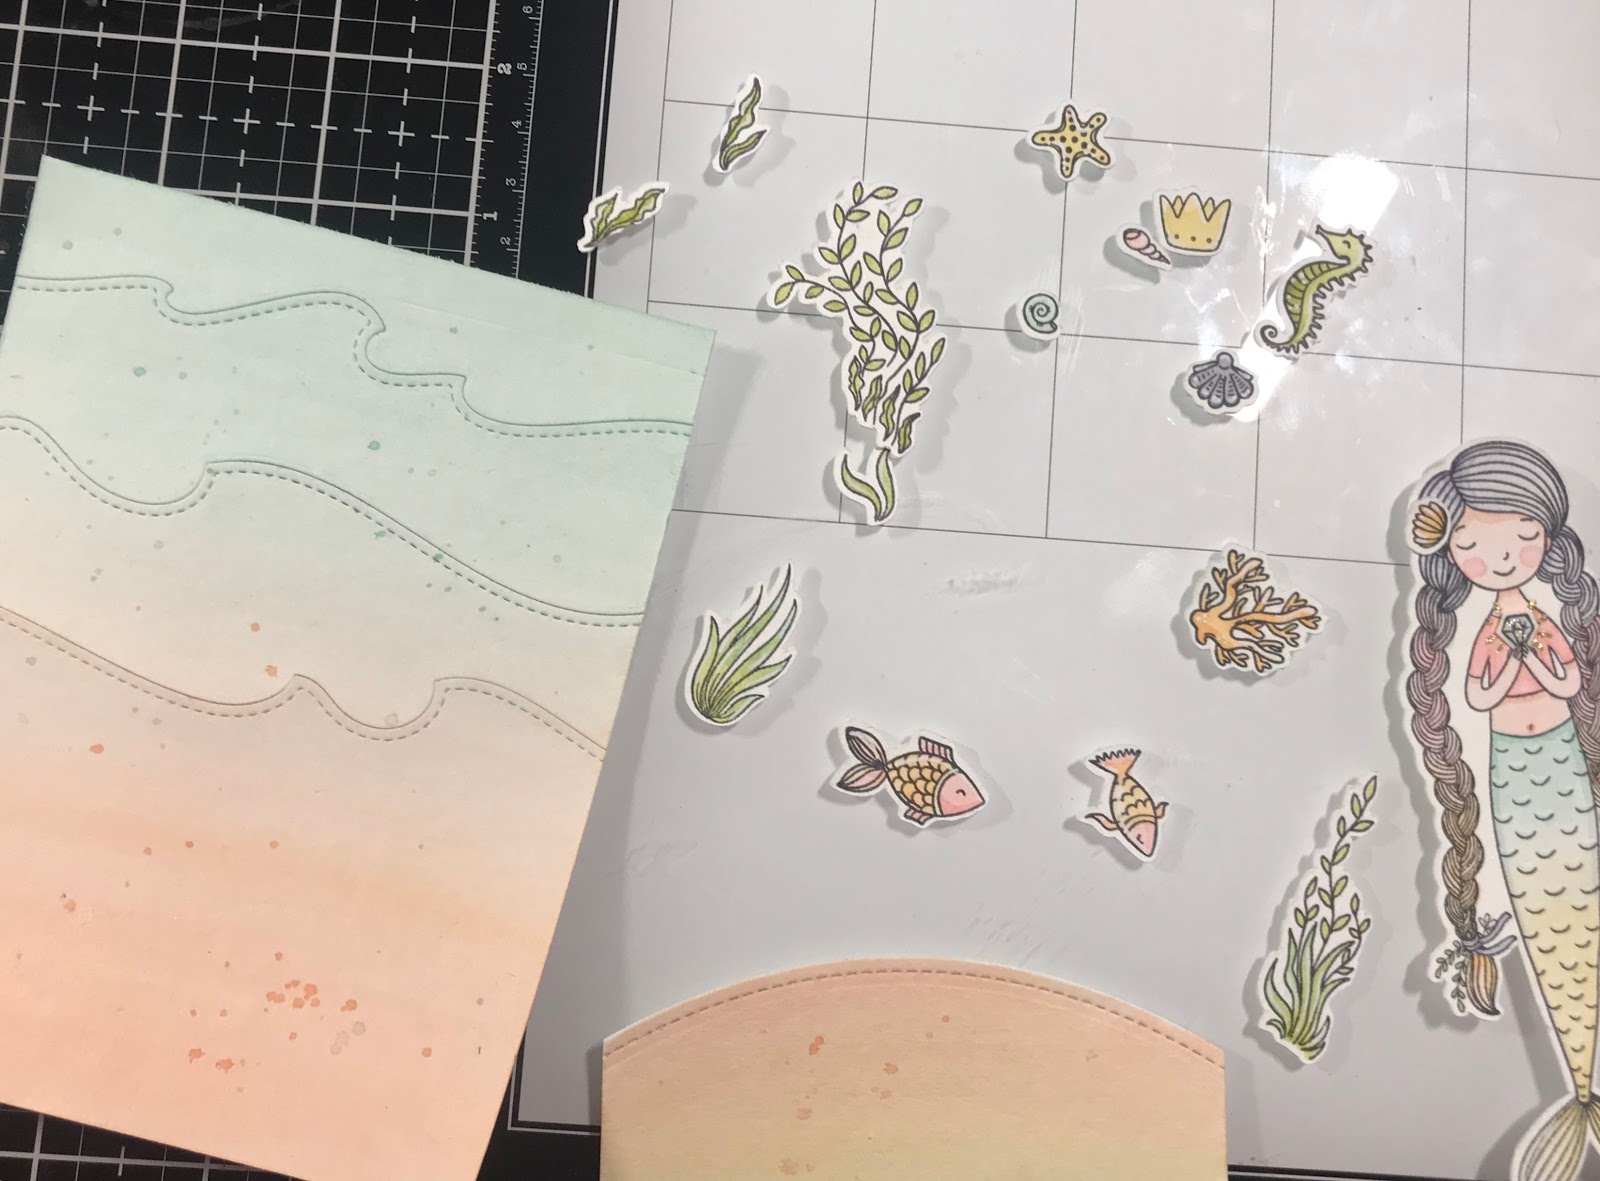
I colored my little images and then it was time for real life crafting. After stamping, coloring, and die cutting the rest of my images I was ready to begin assembling the shops. 

You can see here how I attached the snowdrift first ( which glimmers with wink of Stella) before putting on my signage. I did leave it popped up for some dimension. But that’s just how I roll. 


And a whole lot of tiny pieces later this is what I have. 

I knew I would need at least 3 layers, to fit all the “streets”. So I made my sky layer and trimmed a hillside to ground my castle and trees. Then I made a 2nd hillside layer to be my center street. I attached a third layer, the least rounded of the stitched hillsides, to the 2nd layer panel first, before attaching them with foam tape. Then I placed my shops on the taller of the two streets. Since perspective is everything, the butterbeer cart had to be upfront with the critters. The are larger after all and will appear closer. I also popped my little owl with the Letter from Hogwarts up in the sky so he looks like he’s making a delivery. 
                                     
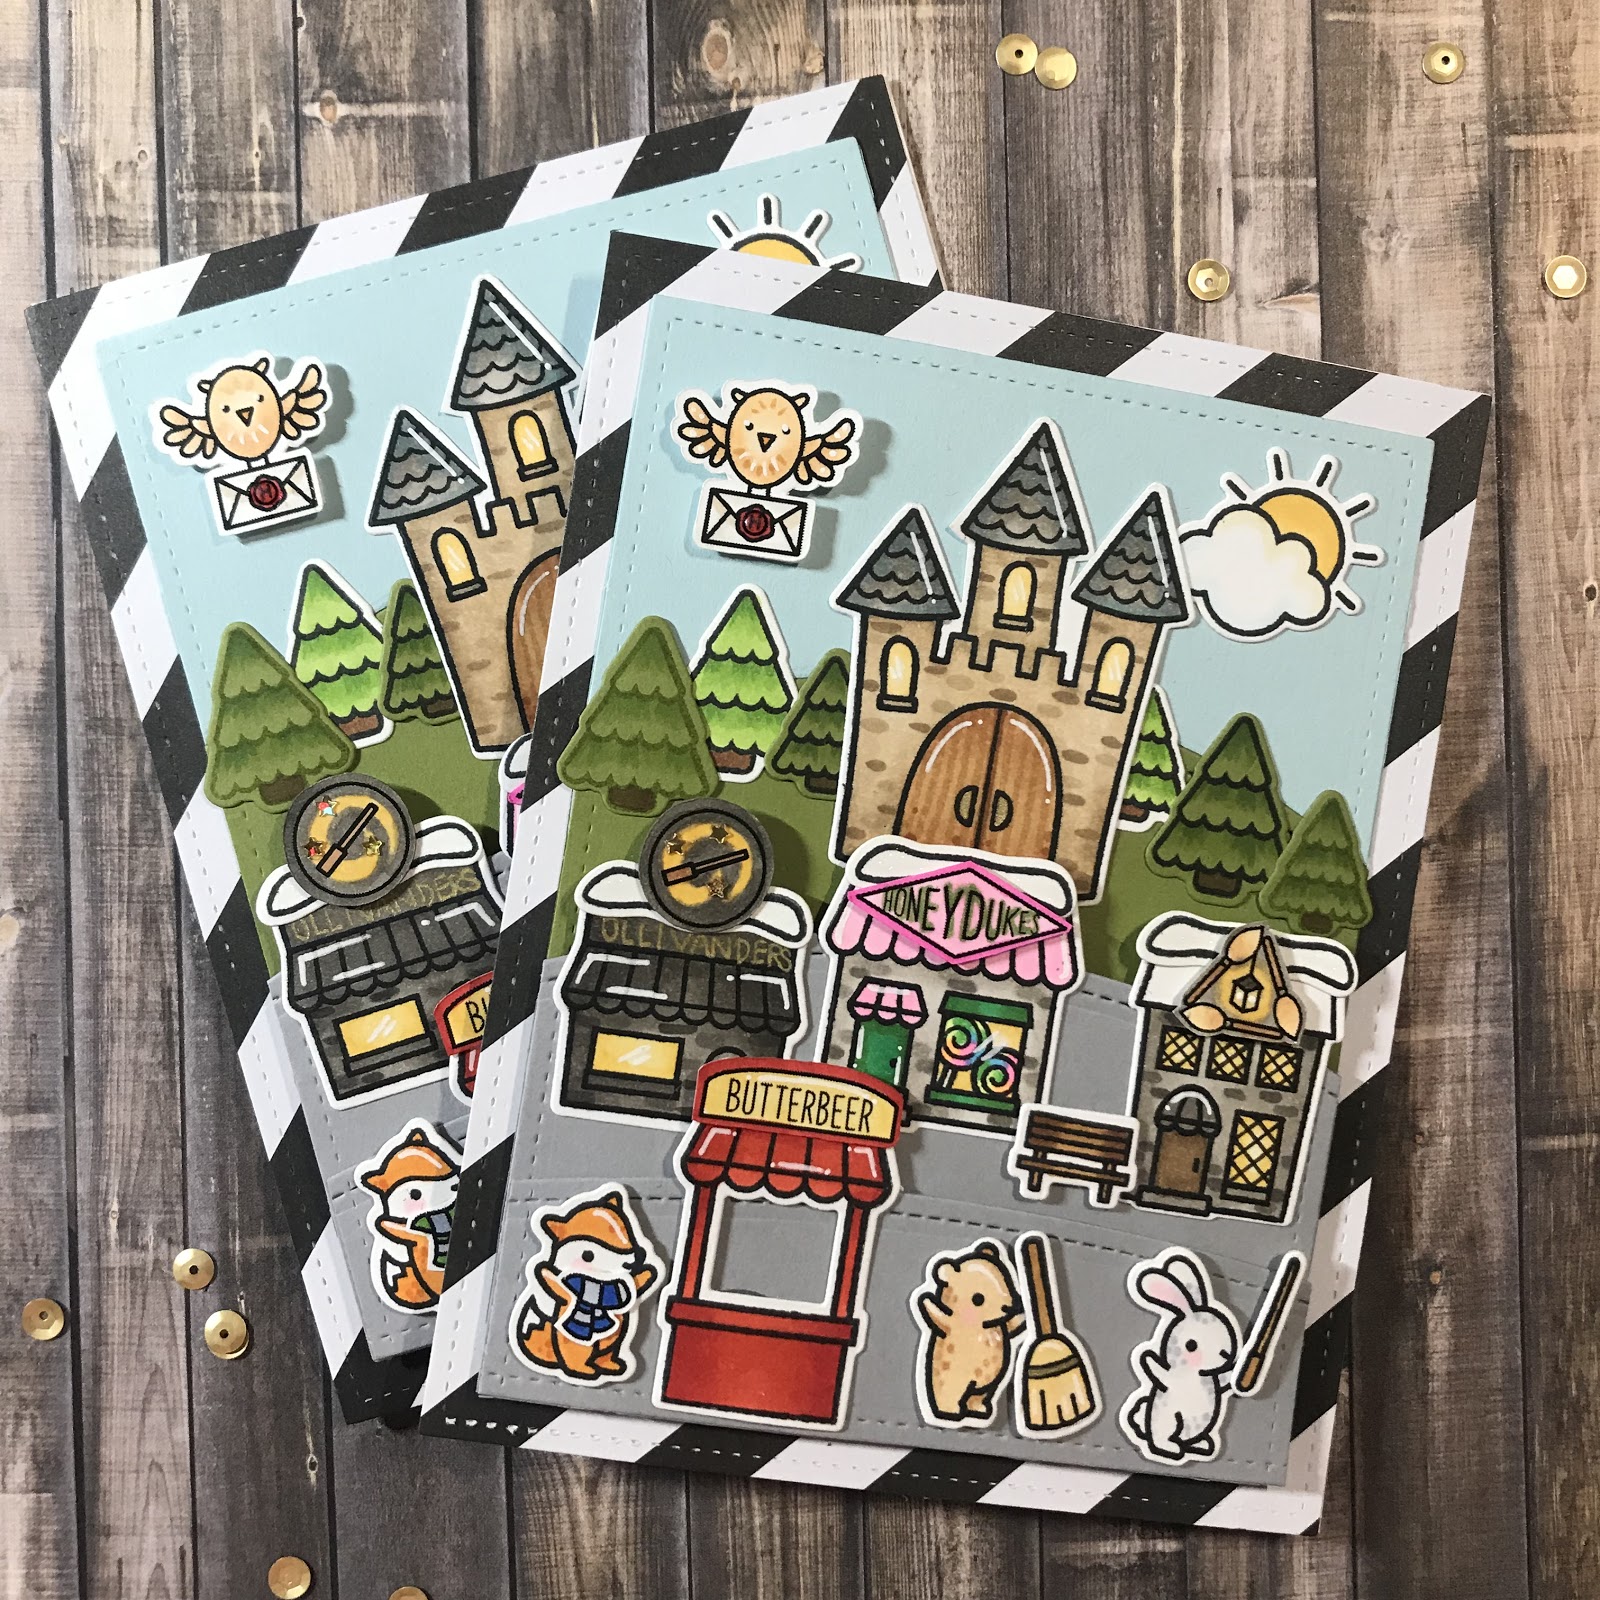
I was able to take some nicer pics the following morning. And I can’t wait to see what the recipients have to say 


Thursday, August 23, 2018

After all this time? Always


I love Harry Potter. And when I say that I really mean it haha. And I like to take every opportunity to try and combine all things HP, with my passion for papercraft. I made a very large and dimensional shadow box the other day to enter into LawnFawns awesome lawnfawnatics challenge. And the theme was Favorite place. So of course I had to roll with The Wizarding World of Harry Potter. I used all Lawn Fawn stamps and dies for this project.

                                          
I had to make a custom housing for this big guy. So I cut two panels for my base from cardstock at 5 x 7.25 inches. I scored and folded the cardstock at 4 and 7 inches. Using the little 1/4 inch tab to attach them together with that red sticky double sided tape. (I can’t remember what it’s called.) I used a stitched frame to cut out the opening panel and I trimmed and scored a piece of striped paper to line the inside.
    

I then hand drew the little signs to fit over the village shops to make my street magical. I had so much fun customizing all these little images. I knew it would have to have layers to fit all the buildings and to give the illusion of dimension since all of the stamps are not the same size. And I’m so happy with how it came out. 
All of my coloring was done with copic markers and Wink of Stella glitter pens. I heat embossed the roller coaster on the very back panel to show the amusement park. And made a little aged banner to pop on front. That’s always my mini version of the Marauders Map.  I loved dressing up these little critters in their HP gear. 

I waited until the last day to enter my card, oops,  and was so excited when it was chosen to be featured. It’s always such an honor. Thank you for stopping by and hopefully I will have a flat version of this project to share soon. 


Tuesday, August 7, 2018

Mama Elephant GDCall

Good morning. Today I’d like to share a card I made using Mama Elephant stamps and dies. I’m planning on entering it into their Guet Design Team challenge. There are so many amazing and talented card makers out there but I though I’d throw my name into the hat also and keep my finger crossed.
I used the absolutely adorable set call Sun and Moon. I purchased this set as soon as it was available. I just loved the faces on the sun and moon, and the cute little mountain trio. I colored my images using copic markers and created the sunrise/twilight background using a photo I found on Pinterest as color inspiration, and distress oxide inks. 

I used the scalloped frame to make my boarder and created a grassy hillside with mountain range (it reminds me of the Grand Tetons) I also used some cloud dies and popped it all up on foam tape crest dimension and give the background a 3D effect. 
My little girl and her forest friends are popped on foam tape as well, I wanted them to look like they were posing for a photo at sunrise. I then finished it off with a few little gems and tiny stars form Lucy’s Little Things. I’m so happy with how this card came together and I hope you enjoy it as well. Thanks for stopping by 


Monday, August 6, 2018

Wow! This is the first one

Hello, if you are reading this... thank you. This is my first post and something that has given me much anxiety over the past couple months. I love being on IG but have never been a fan of keeping up with social media. But as a papercrafter, there are so many opportunities I am missing out on by not having a blog or being on Facebook. So here it is. No more excuses.
My first project I’d like to share is a mermaid scene I created using Honey Bee stamps. I watercolored the images using the smoosh technique with my ink pads and a water brush on cannon watercolor paper.

I used Lawn Fawn dies to create the background. The waves dies for the base and the new scalloped frames for the boarder.

I dusted off my Scan n Cut for this project and also fussy cut a few sections. I set the blade very deep at 7.5 to cut through the thick paper. I then used an xacto blade to carefully cut around her hands to place the gem.


I finished this up with some simple layering using foam tape and a sprinkling of Studio Katia Honey Gold sequins.
                                      
Thank you so much for visiting and I hope to see you back. Davina