Showing posts with label boxcard. Show all posts

Tuesday, June 13, 2023

Pretty Pink Posh June Release Blog Hop

Hello crafty friends! Davina here with some incredible new productsfrom Pretty Pink Posh. The new June release is bursting with sweet juicy fruit. And not just regular fruit, but super cute stamps, dies, and stencils that will always be perfectly in season! 


Some of my favorite products are the strawberry themed items. I couldn't wait to use the adorable berry carton in the Fresh Berries Stamp Set. I decided to make a lush boxcard using the Scallop Boxcard Die Set and filled it with grassy layers and stamped images. 


Although it’s not very visible in the photos, I used the new Layered Strawberry Stencils to create a dreamy pink and green background for my boxcard. I gently splattered the paper before using gold embossing paste for the seeds. Next, I assembled the boxcard, creating 3 grassy inserts and adding a 4th little layer of grass behind the very front piece. 


I stamped the strawberry strip from the Fruit Borders Stamp Set in layers to make a sort of patterned paper. I die cut the little scalloped panels for the boxcard, and colored it in with shades of pink and green to match my card. Then, I stamped the leaves and basket onto colored cardstock with matching colored ink. I combined those large images with copic colored berries and sweet little bees from the Bee Friends Stamp Set


I tucked my images throughout the layers, and adhered the little bees to acetate strips for a floating whimsical look. Finally, I finished off this cute little card with a heat embossed sentiment from the Fresh Berry Stamp set. I really love this soft pink basket of berries and hope that you do too. Thank you for stopping by and make sure to hop along to see the inspiration from the Design Team,

Davina 

Saturday, March 18, 2023

Spring Theme with Pretty Pink Posh

Hello crafty friends! Davina here to share some Spring inspiration using some gorgeous products from Pretty Pink Posh. I combined some brand new products along with some of my favorites from last year, and I hope you love it. 


First, I used the incredible new Scallop Box Card to die cut the pieces for my card. I used some pretty colored cardstock that coordinated with some spring colored plaid patterned paper. I cut 3 of the front pieces, and trimmed two of them in half to make the “layers”. I added some trimmed grassy paper panels to the front of those “layers” before adhering them into my box. 


From colored cardstock, I also created my carrot forest, using the carrot die from the Easter Mug Add On die set. I gently inked the edges with Distress Oxide Inks and added some details with copic markers. I stamped lots of images from the Easter Signs and Easter Wreath stamp sets. I colored everything in using bright spring colors and cut out using the coordinating dies.


I used the large scalloped die to cut out two panels. One for the front, and one for the back. I inked a pink and yellow blended ombré for the front with lots of sparkly splatter, and for the back piece I stamped my sentiment. I adhered the panels and went to work filling up my layers with all the fun goodies. 


I attached all the carrots together into one piece before adding them into my second layer. It left plenty of room for my butterflies to flutter on acetate strips on that back layer. Then I assembled my main images up front. For the very front I layered the garden sign with a popped up “Spring” that I made with the new Happy Spring Shadow Dies

Everything looks great from all angles and this new  boxcard die set  is just the cutest! I hope that you feel inspired to create some beautiful spring projects for yourself. 

Thank your for stopping by, 

Davina 

Wednesday, November 30, 2022

Pretty Pink Posh Holiday Week


Hello crafty friends! Today I’m very excited to be participating in the Pretty Pink Posh Holiday Week! I just love creating with Pretty Pink Posh products, I really appreciate the cute illustrations and how wonderfully the stamp sets coordinate with previously released products. The cute Christmas Boxcard that I’m sharing today has a blend of Holiday sets from present to past. 


I built this boxcard with mint colored cardstock and some patterned papers that have red, pink, green, and mint. For the background panel, I inkblended some pretty pink shades and splattered with water and white ink. Then I used the Layered Snowflake stencils  to create a pink and white blizzard which includes some  raised embossed snowflakes. 


I like to focus my coloring, to match with my papers, so that it all feels themed. I stamped many images from Happy Santa and Reindeer Friends. After coloring the images and using the coordinating die cuts to perfectly cut my images, I added small white dot highlights. I adhered my images throughout the layers of my boxcard making sure that none were completely hidden. Then I heat embossed some snowflakes on vellum and tucked them into the scene on skinny acetate strips so they look like actual snowfall. 


To finish off the boxcard, I used gold embossing powder for the scripty “Joy” sentiment from the new Pine Wreath stamp set (I love that it has a coordinating die!) and mounted it onto a white banner that reads “to the world” from an older Joy stamp set. I think the bright red cardstock really packs a punch for the front. 


Finally, I stamped my sentiment onto the back and added a few little details and one more reindeer to make this beautiful from all angles. I hope that you enjoy this festive and bright card, make sure that you visit the the PPP shop to see the incredible products and take advantage of all of the holiday deals! 

Thank you for stopping by,

Davina 

Saturday, October 1, 2022

Pretty Pink Posh Halloween Week


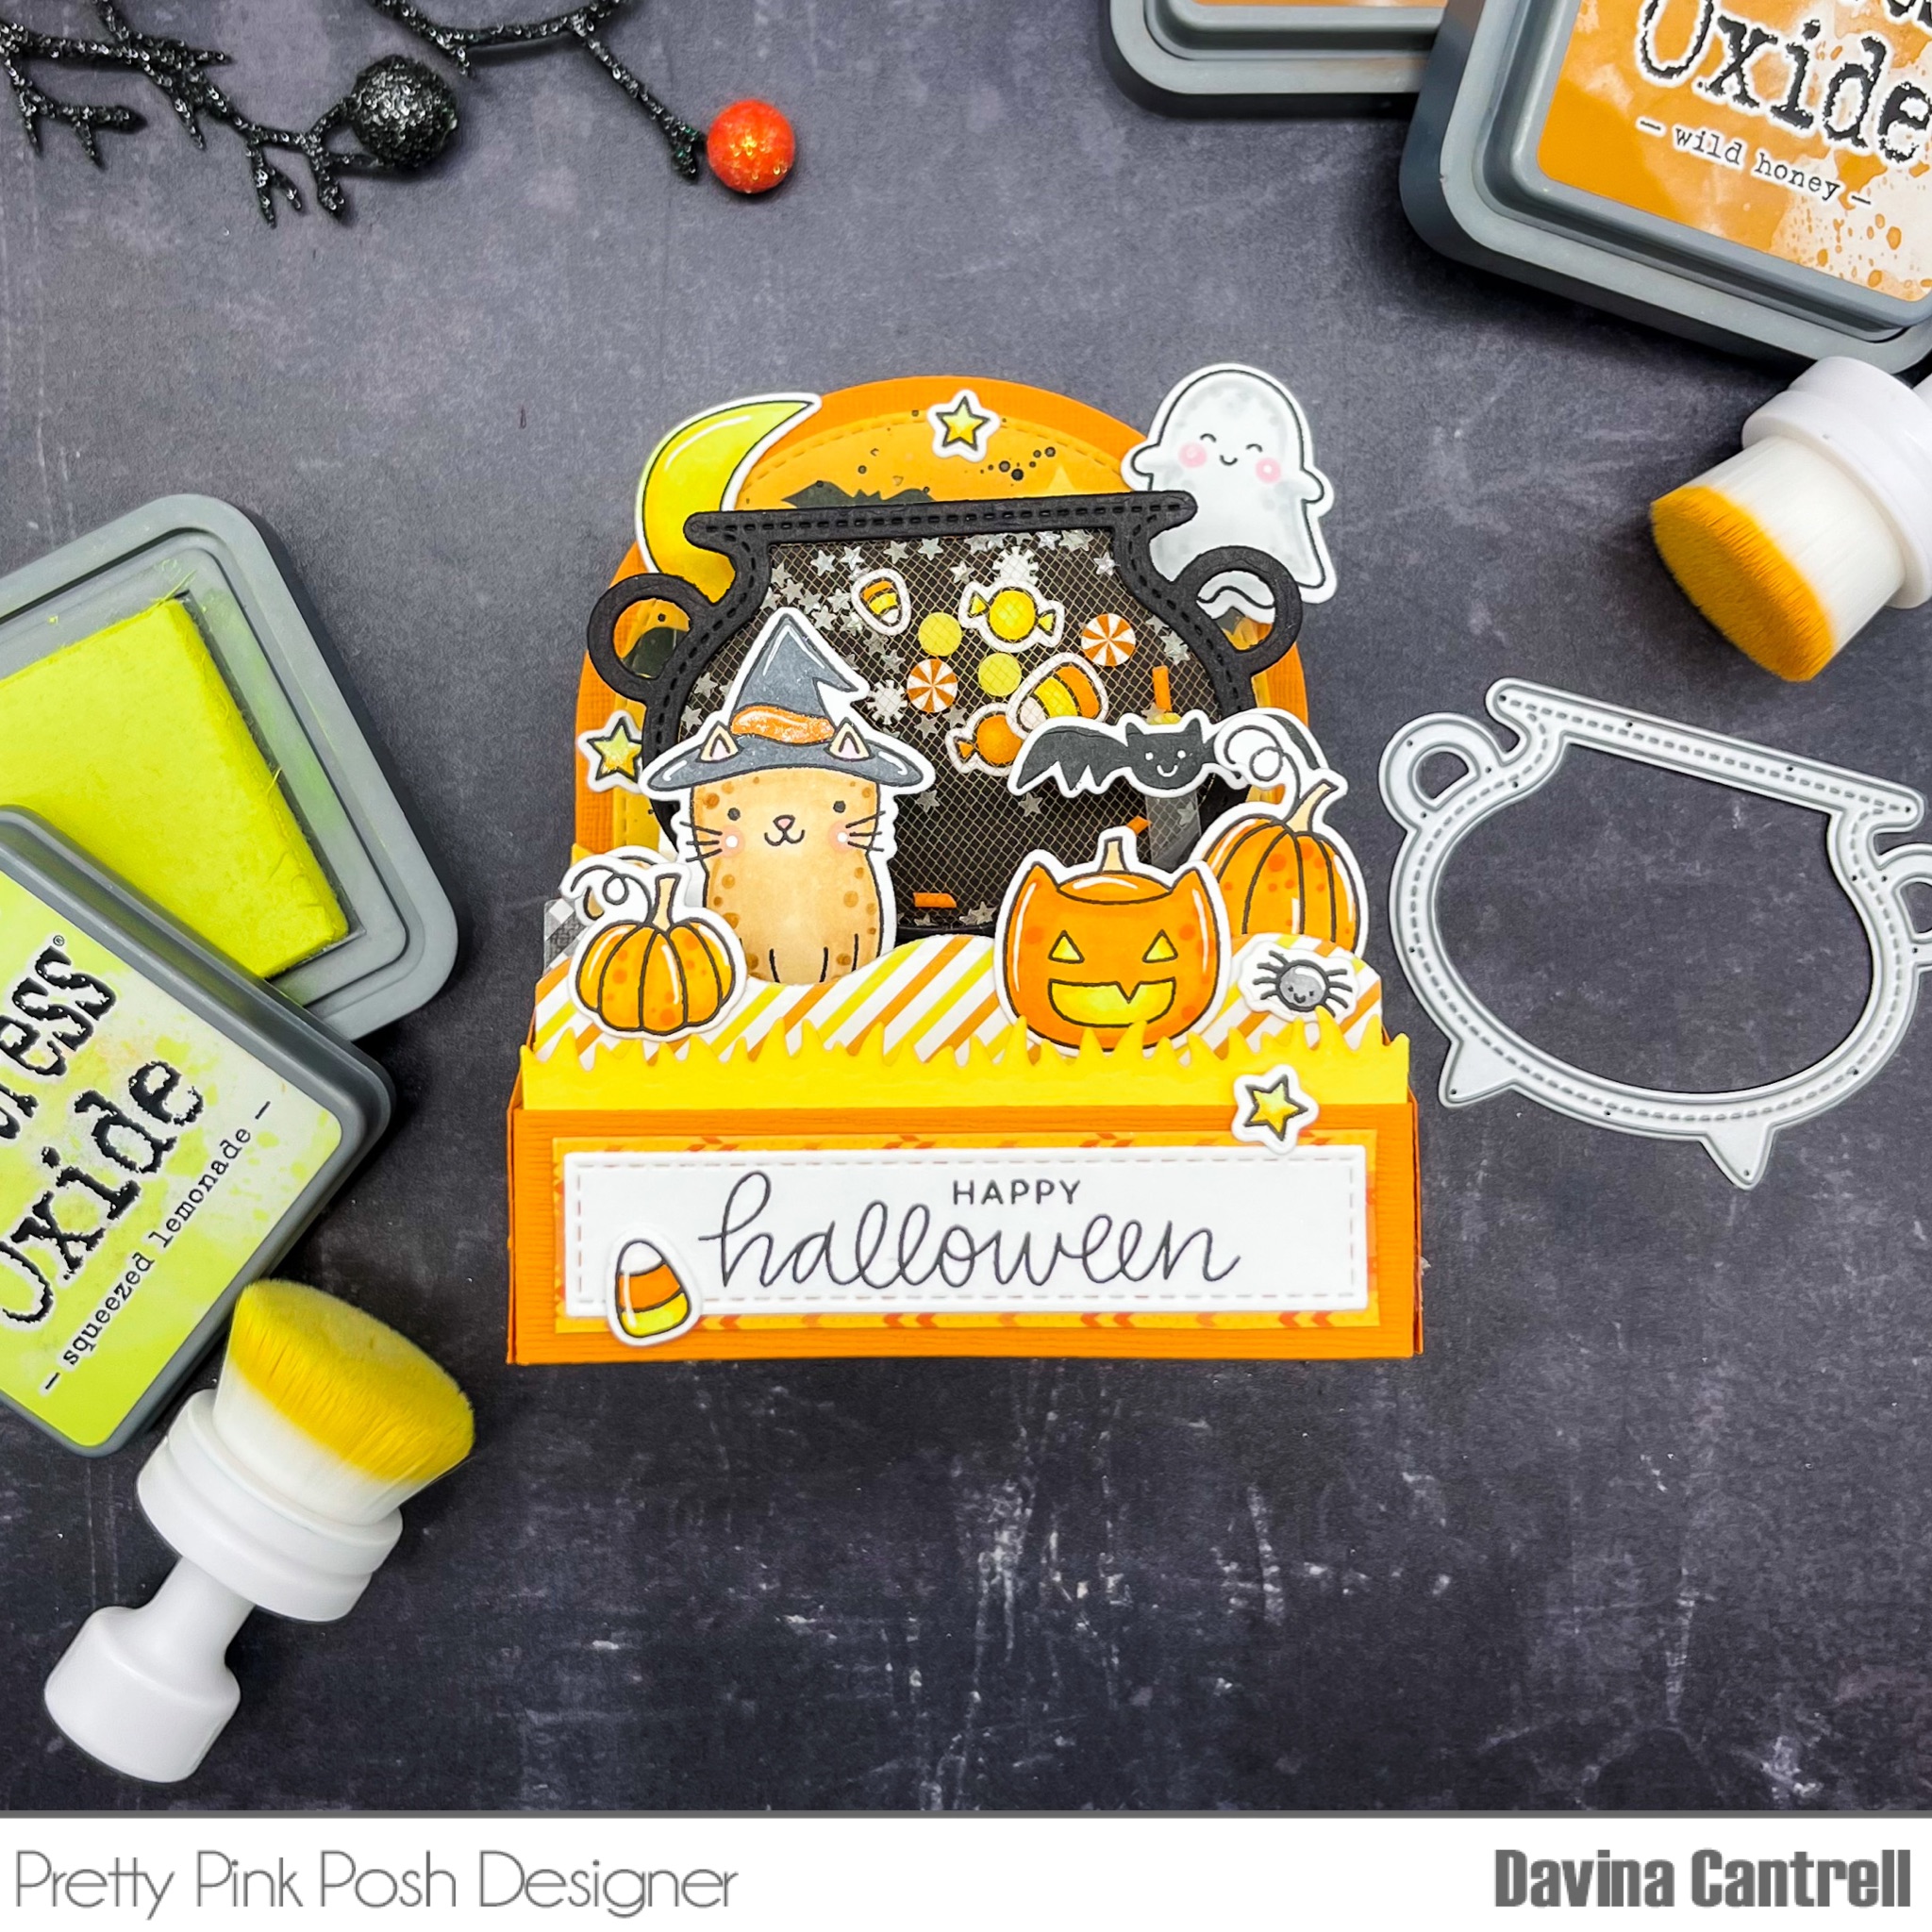
Hello Crafty Friends! I’m so excited to be participating in the Pretty Pink Posh Halloween Theme Week. All of their products are so wonderfully illustrated and designed, that it is a breeze to pull multiple stamp sets, stencils and dies together to make the cutest cards and decor. I did just that for this bright and bold shaker boxcard. 


I stamped images from newer and older sets to build this scene. Halloween PalsGhost FriendsHalloween friends, and Giving Thanks to name a few. I always use the coordinating dies to achieve a clean and polished look to my images. 


Before assembling this card, I created a flat mesh shaker using the new Cauldron Shaker Die. I cut the shaker twice, added a few stamped images along with some glow in the dark mini stars and some clay confetti pieces from the Halloween Party Mix. I sandwiched a small piece of orange tulle mesh to make a flat shaker using 1/8 double sided tape. 


For the background I inkblended an orange ombré sky and used the Spooky Sky Stencil to ink the bats and emboss the clouds onto my Bristol cardstock. I gently splattered with water and black ink to distress and “spookify” the sky. 


I was excited to use up several pieces of patterned paper remnants, that I had in my stash, for each of the layers and side panels of the box. I adhered my images and shaker through the layers and even made sure to have some floating pieces using acetate strips. I finished this up by stamping a sentiment on the back and adding a final pumpkin. 


I hope you love this fun and spooky card and appreciate you stopping by to see how I created it. Now is the perfect time for you to stock up on your Halloween supplies at Pretty Pink Posh, all of the Halloween items are on sale so don’t miss out! 
Davina