Showing posts with label fall. Show all posts

Sunday, October 29, 2023

Pretty Pink Posh Autumn Theme Week

Hello crafty friends, Davina here to share so fun autumn inspiration. Pretty Pink Posh always has the prettiest fall themed products and I pulled together some of my favorites for you. There are several layered leaf stencil sets, and I gathered together a newly released stencil to use as the background for my scene. 


I started this fall card by inking the Layered Fall Wreath stencil onto the largest Eyelet Rectangle layer. I used shades of yellow, coral, orange, brown and even green for these leaves. I splattered the panel with brown and gold ink and put aside to dry. Next, I die cut the super cute Acorn Shaker Die from creamy cardstock, and inked it with several shades of brown. The large layered mushroom from the Fall Mug Additions is one of my favorite dies, with that fancy little ruffle. I colored it in shades of cream and coral, then added some splashy details. 


The main focus of this scene are the two sweet birds that are also inked die cuts. I cut two of the birds from the Stitched Birds dies, and used the residual ink on my brushes to gently add some color to these cuties. After adding some small copic details, I assembled the pieces. 


I adhered all of my die cut pieces to the stenciled background, then added a stamped sentiment from Autumn Pumpkins to the center. I loved the look of the crisp brown lines so I decided to stamp a few leaves from the same stamp set, and tucked them around the scene. I finished this off with a sprinkling of sequins from the Matte Gold Confetti Mix.

I just love how all of the products from Pretty Pink Posh mix so well together, it makes so easy to put together beautiful cards no matter what your crafty style is. Thank you for dropping by,

Davina 

Saturday, October 1, 2022

Pretty Pink Posh Halloween Week


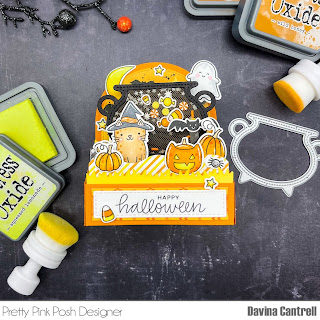
Hello Crafty Friends! I’m so excited to be participating in the Pretty Pink Posh Halloween Theme Week. All of their products are so wonderfully illustrated and designed, that it is a breeze to pull multiple stamp sets, stencils and dies together to make the cutest cards and decor. I did just that for this bright and bold shaker boxcard. 


I stamped images from newer and older sets to build this scene. Halloween PalsGhost FriendsHalloween friends, and Giving Thanks to name a few. I always use the coordinating dies to achieve a clean and polished look to my images. 


Before assembling this card, I created a flat mesh shaker using the new Cauldron Shaker Die. I cut the shaker twice, added a few stamped images along with some glow in the dark mini stars and some clay confetti pieces from the Halloween Party Mix. I sandwiched a small piece of orange tulle mesh to make a flat shaker using 1/8 double sided tape. 


For the background I inkblended an orange ombré sky and used the Spooky Sky Stencil to ink the bats and emboss the clouds onto my Bristol cardstock. I gently splattered with water and black ink to distress and “spookify” the sky. 


I was excited to use up several pieces of patterned paper remnants, that I had in my stash, for each of the layers and side panels of the box. I adhered my images and shaker through the layers and even made sure to have some floating pieces using acetate strips. I finished this up by stamping a sentiment on the back and adding a final pumpkin. 


I hope you love this fun and spooky card and appreciate you stopping by to see how I created it. Now is the perfect time for you to stock up on your Halloween supplies at Pretty Pink Posh, all of the Halloween items are on sale so don’t miss out! 
Davina 


Monday, September 19, 2022

Pretty Pink Posh September Release


Hello crafty friends. Davina here, to celebrate, the Pretty Pink Posh September Release. I’ve made several cards using these beautiful fall products and I am participating in the Instagram Hop today! Hop along leaving comments at each stop, for your chance to win $30 to the Pretty Pink Posh Shop


Every set in this release is gorgeous, and they all mix together with wonderful results. This release has several stencils, stand alone dies sets, and stamp sets that could not get any better. I used the Fall Basket Die Set as the centerpiece for this card. I blended the wooden strips with light brown ink and tiny splatters, then cut the pumpkins from orange cardstock that I accentuated with lighter and darker oranges. I used several of the cute mice from the Mouse Friends stamp set to bring an element of cuteness to this scene. Then, I assembled everything on top of a stenciled background that I created with the Layered Foliage Stencils. 


It’s so easy to make stunning backgrounds using the many detailed stencils that are offered by PPP. I created a completely different look with the Falling Branches stencil, that I used white embossing paste over a soft inkblended background. I assembled a sunflower filled scene using the new Fall Envelopes stamps combined with Potted Sunflowers and the Thanks  stand alone scoot die. 


My final card is super cute and uses the pretty Fall Borders stamps set. I layered the pumpkin strip over a Fall Tree die cuts and some falling leaves and sentiment from the  Autumn Wreath  set. I finished this card off with the adorable pup from the Halloween Critters.

Thank you so much for stopping by, don’t forget to visit the Pretty Pink Posh Blog to see the Inspiration from the entire team. 

Davina 

Friday, November 13, 2020

November BRI Moodboard Color Challenge


 Hello Crafty Friends. Davina here with a little BRI Moodboard inspired card today. The November colors  Amanda chose are very easy to play with. Harvest Yellow, Clay Pink, BlackBerry, and Rich Teal make up the quartet of color this month.  

The project I’m sharing today is using a few sets from Paperie Ink. I’m very new to this brand and purchased a few seasonal sets last month. I didn’t have a chance to use them sooner, but I’m so loving how cute these characters are. I combined the stamp sets  Autumn is Calling and Happy Holi-yay, along with Lawn Fawns Meadow Backdrop Die. I stamped all of my images with Momento Rich Cocoa ink and copic colored everything using light and dark shades of this months colors. 


Since there are no coordinating dies for these stamp sets, I had to use the scan n cut. Which worked fine considering I’m never going to fussy cut this many images. I recommend always cutting out before you color you images. The Scan n cut is notorious for mis-reading an image, and therefore not cutting out properly. As for images like the trees, that have small gaps in the outline, use a pencil to fill in the space for a solid cut. It will read the pencil, along with the ink, and cut out the image cleanly. 

Once my images were cut and colored I cut the Meadow Backdrop from some yellow Cardstock and inked the grassy edges with Scattered Straw & Dried Marigold Distress Oxide Inks. Next, I inkblended a pink and purple sky using several colors of Oxide Ink onto white Bristol Smooth Cardstock, then splattered with water, and white and gold ink. Once dry I heat embossed my sentiment onto the sky using Lawn Fawn Gold Embossing Powder

I assembled my card by glueing the Meadow frame onto my inkblended panel, then adhering the trees and sunflowers behind the grassy layers. I popped my border image up with some narrow foam tape, and added the remainder of my images. I brushed some glittery Clear Wink of Stella onto my lights and pumpkins for a little “razzle dazzle”. I’m so happy with how cute these images are and already ordered a few more sets to build my collection of Paperie Ink stamps. 

I hope you like this card and take the time to use the November #BRIMoodboard this month. As always, we will be hosting a color challenge and choose an eligible entry to win $20 to the Butterfly Reflections Ink shop. Just add your November Moodboard Inspired project using the Inlinks button below, and use the hashtag #brimoodboard on social media. Most brands are welcome, as long as they are carried in the shop, and please make sure you are linking a new and original project made by you. Thank you for stopping by, 

Davina 

You are invited to the Inlinkz link party!

Click here to enter


Saturday, September 19, 2020

Pumpkin Patch with Lawn Fawn and Reverse Confetti

 Hello friends! Davina here, on the blog, with an exciting interactive card to share. My project is another fun example of the beautiful September Moodboard and a mashup between Lawn Fawn & Reverse Confetti products.  

I really love the way these beautiful colors come together. I’ve used them several times this month, in both soft and bold versions, and with stunning results each time. I wanted to use glittery gold cardstock for this camera die and love that I found a curry cardstock, is my stash, that was very similar in tone to pair up with it. 


As usual, all of the products used are available on the Butterfly Reflections Ink website. And I will provide links through this post for all of the products.  

I started by building my camera using the newer Lawn Fawn Magic Iris Camera Die Add On and the Camera Pull Tab Add On dies. I cut the camera 3 times from curry cardstock, glitter gold cardstock, and a Blush striped patterned paper in my stash, trimming off just the stitched strip. I used the circular lens die from the pull tab set to cut the glittery gold, blush pink, and adhesive backed fun foam. 

Next, I assembled the camera. I used LF Glue Tube to glue the gold paper to the curry cardstock.  Then I adhered the blush strip to the front after inkblending a little Tattered Rose Distress Oxide Ink to the edges. I insert the blush cardstock circle into the center of the camera lens and secured with Scotch tape from behind. I sandwiched an acetate circle between the foam stitched lens circle, and the gold circle to create a mini shaker element. Before adding the shaker components to the card, I used the short slot die on the top of the camera for the photo to pull out of. 


Then, I added some small flat sequins onto the pink circle before topping off with the foam circle, completing the small shaker element. I added a few other details to the camera face, like the push tab, and the flash with more liquid glue. 

Now for some coloring! I stamped my super cute images from the new Reverse Confetti set Pick of the Patch set using LF Crunchy Leaf brown ink, and copic colored in shades from the Moodboard. I die cut the images using the coordinating die set, and added small highlights to the images. For the Polaroid, I die cut the frame and tabs, then cut a smaller piece of cardstock that I masked and stamped a single layer scene onto. After coloring, I attached the frame over the top and assembled the pull tab as shown in the LF instructional video for the new camera pull tab. 


I mounted the interactive camera onto my blue and yellow card panel, then adhered my images all over to create the pumpkin patch. I really love how this turned out, and I’ve been playing with it non stop. The brown ink really works well with this color board. There’s still a couple weeks for you to use this color board and link your card into the color challenge on my blog, for your chance to win a $20 gift certificate to the Butterfly Reflections Ink shop. 

Thank you for stopping by,

Davina