Showing posts with label new release. Show all posts

Wednesday, March 6, 2024

Pretty Pink Posh Spring Release Blog Hop


Hello crafty friends! Davina here to share Spring Joy with the new Pretty Pink Posh release Blog Hop. This beautiful release is full of Easter and Spring products sure to make you fall in love. As always there is a diverse amount of products from stencils and stamps to many new die sets and so many gorgeous butterflies! There are also add ons to our favorite lines, like the super cute themed cupcakes and playful train sets. Make sure to “Hop Along” and leave a comment at each stop for your chance to win one of 3 $30 gifts.


I made a Spring shaker card using a combination of several new items. I started by cutting a background using the Butterfly Cover Plate from heavy cardstock. I made it a shaker by mounting it with foam tape over a pretty pastel plaid backgroundand and filling it with the new assortment of shaker beads called Pastel Party. I’ve been adding an extra 1/4 inch to my cards recently, so that my pattered papers can extend beyond the A2 cover plates. So I’ve been cutting larger card bases from my extensive stash of 12x12 cardstock. 


I stamped and colored two of the spring themed cupcakes from Easter Cupcake Set, and die cut using the now de-tabbed coordinating dies! They are incredible. I also die cut several butterflies from the new Stitched Butterflies Dies that are so perfect and detailed for year around projects. I arranged my images onto my card and topped the cupcakes with a glittery “Spring” that I cut from the new Spring Script Die.

I finished off this card with an embossed sentiment from Ester Sentiments Strips Stamps Set on a layered Sentiment Strips Banner, and a few sparkling sequins. I hope you love this new release as much as I do and take a few minutes to participate in the blog hop. Make sure you leave a comment at each blog for your chance to win one of 3 $30 prizes. 

Pretty Pink Posh blog 
Nichol Spohr
Amy Rysavy
Marine Simon
Barbara Tarayao
Lindsey Larsen
Kristie Marcotte
Lea Lawson
Carly Minner
Davina Cantrell  you are here 


Friday, September 23, 2022

Mama Elephant Stamp Highlights Joyful Greeting


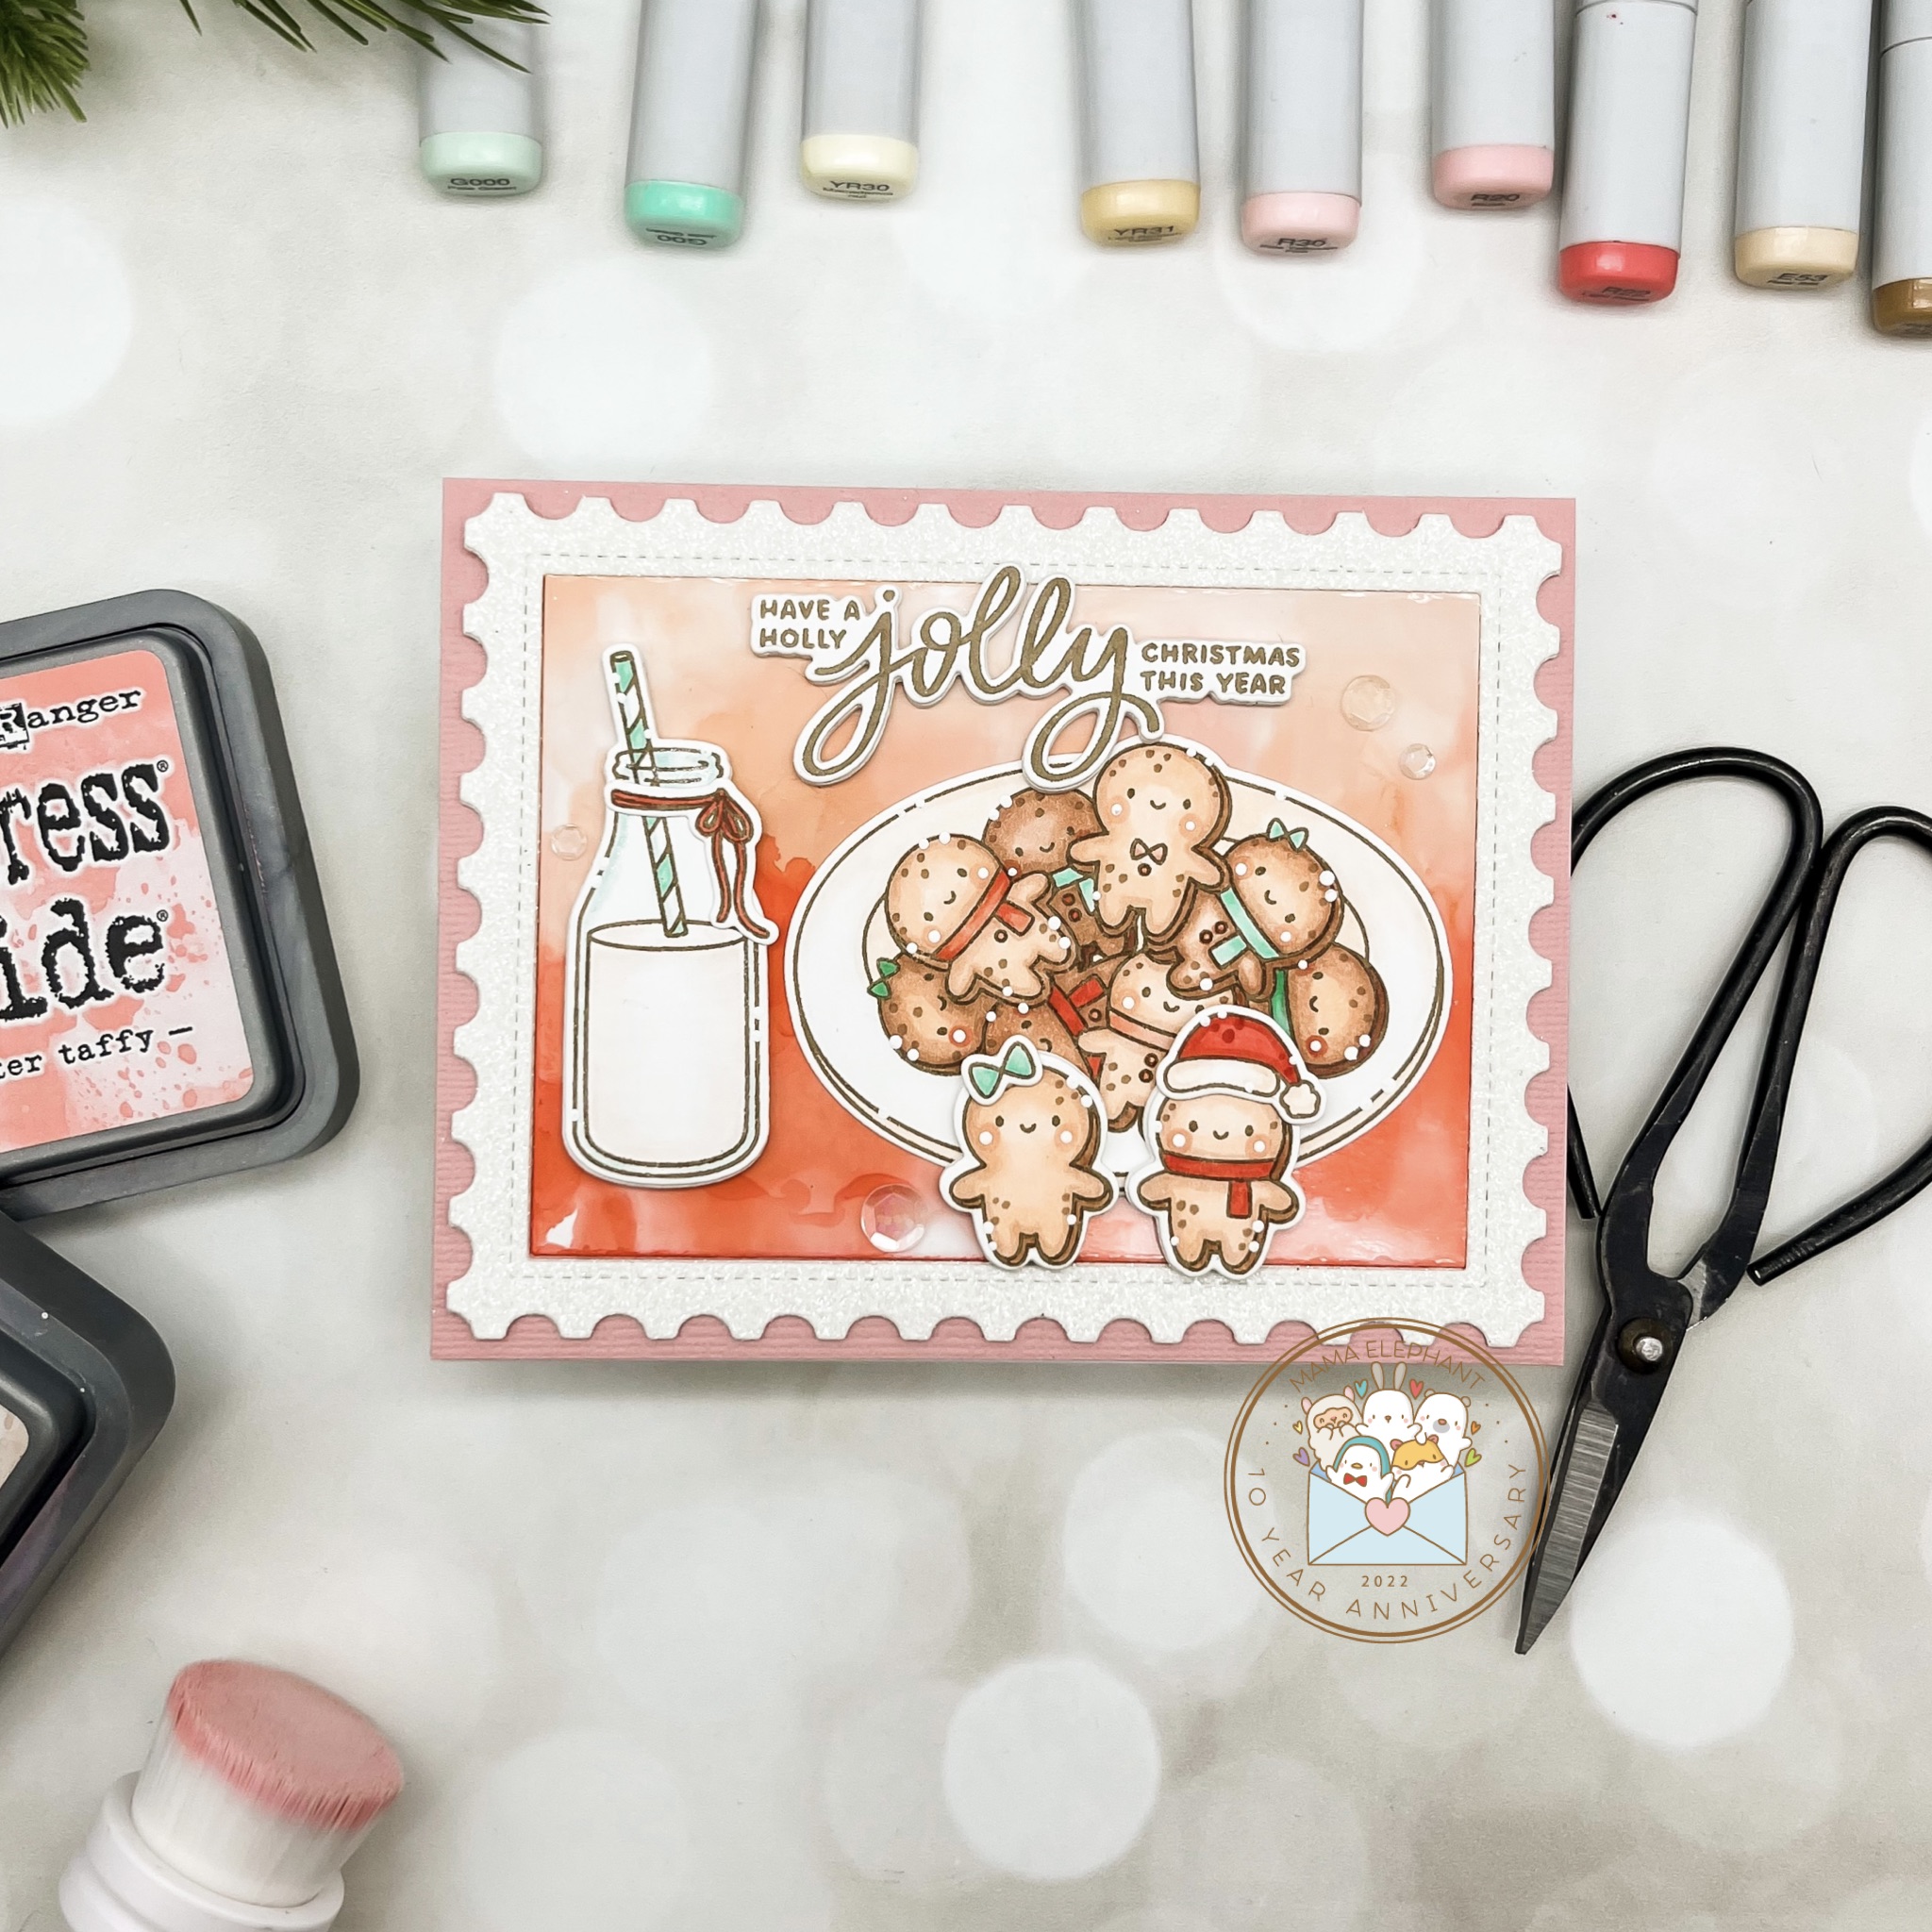
 Hello crafty friends! I’m so happy to be participating with the Mama Elephant team once again. Todays “Stamp Highlight” is the wonderful Holiday sentiment set called Joyful Greetings. This tasteful and pretty set is full of Christmas messages that would be perfect for the front of a card or even the inside message. Each sentiment has a coordinating die so you can place the sentiment over a busy background like I have with my “Jolly” card. 


I wanted a soft yet bold background for this gingerbread man filled card, so I used alcohol inks on white photo paper for a textured looking background. I created a postcard frame using the Postage Frame Creative Cuts and fit my inky background inside. I stamped and cut images from the Gingerbread Cookies Stamp set using brown ink soft pastel Christmas colors. 


I finished this card by stamping my “Joyful Greeting” with Taupe ink and centering in the top of my card. I really love the results and think that these sentiments will coordinate well with any holiday themed stamp set. 

Please make sure to head over to the Mama Elephant Blog to see the inspiration from the entire DT for all of the amazing new products. You won’t want to miss out on the sale and free item promotions! 


Monday, September 19, 2022

Mama Elephant Stamp Highlights Busy Elves


Hello crafty friends! Today I’m honored to be participating in the Mama Elephant Anniversary Stampede. The “Stamp Highlights” begin today and and we are showcasing the cutest elves around from the set called Busy Elves. These adorable images are beautifully illustrated and just as cute as their smaller counterparts from the Little Elf Agenda set. 


I stamped and colored these cuties using brown ink and pastel Christmas colors like pink, coral, mint, and yellow. I assembled my images on top of some glittery snowy hillsides with a die cut snowy background using the Galactic Cover Creative Cuts. 


In my soft pink sky I adhered a large sentiment that stamped with Everything Nice stamp set, I love that they have coordinating dies to make these sentiments really stand out. And over some of the busy elves I placed sentiments from the set, in little word bubbles. 

Head on over to the Mama Elephant website for all of the details about their anniversary specials and the freebie sets that are available with purchase. There is so much cuteness that you want to miss out.  Thank you for stopping by, Davina                


Friday, February 18, 2022

Mama Elephant Stamp Highlights: Wishes Enclosed

 Hello crafty friends! The Mama Elephant new release Stamp Highlights continue with Wishes Enclosed. This fun sentiment set is my favorite set of the release. Which is odd because I never love sentiments so much. It matches the super cute Christmas set Everything Nice, which I also fell in love with. I used these great sentiments on almost every card sample I created for this release. 


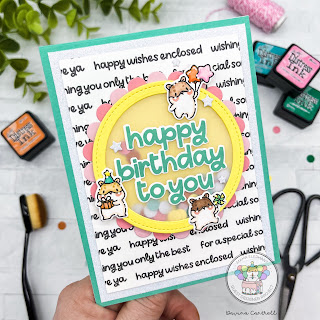
This bold shaker card uses all the small sentiments in addition to a large one. I created a patterned paper by lining up 3 sentiments, and stamping it every 3/4 of an inch down a piece of bright Neenah cardstock. Once I made it down the panel I alternated the sentiments and staggered them a little differently before repeating the process. Once it was done I pulled out some of the dies from the last release and got to work.

 Using the B2B rectangle CC dies, I used the 3 largest to cut an aqua, white glitter, and my printed panel. I adhered them all together and set aside. Using the Circle Combo CC dies, I cut two scallops from pink cardstock. I inked the edges of one a little darker, then adhered it to the unlinked one. Next I cut two yellow circles using the coordinating stitched die. I used the next size down to cut the center from one of those yellow circles. I backed it with vellum and skinny foam strips along the edge before layering it onto the first circle. I had made a little pile of paper confetti using the confetti die from the Party Scene Cover CC, then adhered it over the pink scalloped circle I made. 


I stamped HBTY using a Wishes Enclosed sentiment in Aqua ink, and die cut it with the coordinating die. I glued it to the center of the shaker and surrounded it with 3 adorable hamsters from the Little Hamster Agenda stamp set. I couldn’t love this more and will have a hard time giving it away haha. I hope you enjoyed this card as much as I do. Don’t forget to head over to the Mama Elephant Blog to see the inspiration from all the Design Team. Thank you for stopping by, 

Davina 

Thursday, February 17, 2022

Mama Elephant Stamp Highlight: Little Hamster Agenda

 Hello crafty friends! Mama Elephant is beginning  the stamp highlights for the February release, and today we get to focus on Little Hamster Agenda stamps and creative cuts. The Little Agenda series by Mama Elephant is one of my favorites. All the cute images in different poses, with so many wonderful accessories, make them perfect for any occasion. They are truly some of my favorite things to create with. This adorable Hamster addition does not disappoint. 


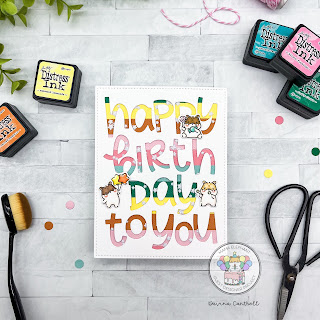
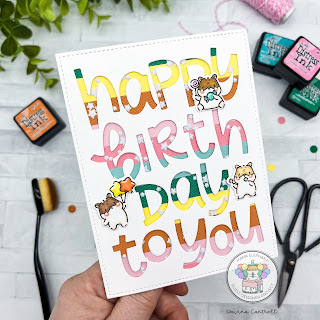
The mesh shaker card I made combines two new items. The amazing new Word Cover- HBTY  creative cuts and the  Little Hamster Agenda stamps and dies. I cut the Word Cover plate from bright white cardstock and backed the panel with white mesh (tulle) using double stick tape. On an A2 sized card base I alternated strips of colored cardstock to corner the entire front. I added many lose small glittery stars that I made using the small star confetti die included with the Party Scene Cover- Creative Cut and white glitter cardstock remnants. Then I carefully adhered the die cut panel on top. I put the reserved center pieces in their places and moved the stars around a little so I could see some in each letter. 


Finally, I stamped a few little hamsters that looked like they were celebrating, and colored them with copic markers. I die cut them, then added small white dot highlights. I arranged the images around the word panel, and voila! 

I think this little card was relatively simple and easy, but packs a huge punch with the stripes and shakeable stars! I hope you give one of these “mail friendly” mesh shakers a chance on day. Don’t forget to head over to the Mama Elephant Blog to see all the great inspiration. Thank you for stopping by, 

Davina 


Saturday, February 12, 2022

Mama Elephant February Stampede Blog Hop


Welcome to the Mama Elephant Design Team blog hop!

Our newest release is now live and available for purchase in the store!

www.mamaelephant.com

I’m very happy to be participating with the Mama Elephant Team as a guest designer for February. This month the the release is all birthday themed and I absolutely love it! I made an effort to make all of my projects with the same color scheme, and it looks so cute together. I can’t wait to share everything with you. Today, I have a card that uses quite a few of the new sets.  

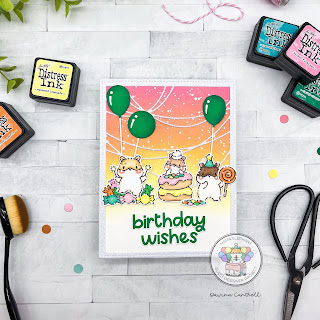
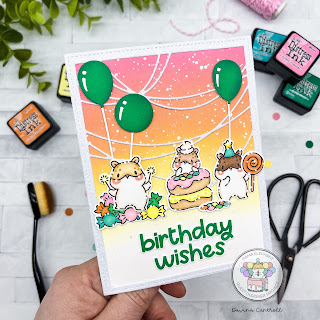
I started by cutting some glittery white cardstock with the new Party Scene Cover- Creative Cuts. My favorite part of this die set is how detailed all the pieces are. I layered this scene over a piece of inkblended cardstock that I splattered with glittery perfect pearls and white ink. I stamped some adorable hamster images from two sets, the new Celebration Hamsters and the previously released Sweet Treats.

I adhered one of the new Hamster characters on-top of the pile of candy, covering the llama.  Then I built some balloons using the Party Scene dies, making sure to ink the edges for a little visual dimension.  Finally, I stamped the sentiment from my favorite new set, called Wishes Enclosed, with bright emerald green ink and added to the bottom. 

Check out the rest of the hop for amazing inspiration from our Design Team!


To celebrate the new release, Mama Elephant is picking 1 winner to win a prize pack! 


» 1. Leave a comment on the collective Design Team's Instagram Stampede post
» 2. Leave a comment on our Facebook Stampede post
» 3. Leave a comment on any of the Introduction videos on YouTube
 
Each action qualifies for one entry, max 3 entries per stampeder please and good luck!
Open to US entries only.
 
Check out the rest of the hop for amazing inspiration from our Design Team!


Thank you for stopping by! Have a great day from all of us!


Friday, January 8, 2021

Special Delivery with Bri Moodboard

 Hello crafty friends! This is my first blog post of the year with Butterfly Reflections Ink, and of course I am using the gorgeous January BRI Moodboard. If you haven’t already drooled all over these elegant and glam colors, they are Icy Mint, Powder Pink, Rose Gold , and Deep Space Blue. 

I have so many different card ideas I want to create, but I still hadn’t used some of my Winter Lawn Fawn haul, as well as most of the brand new Lawn Fawn too. So I thought I’d better get to it! I used the new Special Delivery stamps and dies, along with the Add On set with the boxes and labels. I love that owl and his little mail man hat so much. I combined these images, with some bears from the winter release Den Sweet Den, set to create a lovely snowy book delivery. 

I stamped all of my images using the brown Crunchy Leaf in from Lawn Fawn, and copic colored my images using colors that fit the Moodboard. After die cutting the images using the coordinating dies, I added white dot highlights. I cut some paper panels using Lawn Fawn cross stitched layers, then inkblended a powder pink sky onto some Bristol smooth cardstock using Tattered Rose Distress Oxide Ink. I splattered it with white ink and metallic Rose Gold Shimmer Spray. I layered some glittery cardstock to create a snowy hillside 

Before attaching my images I cut a wavy sliding channel for my owl to fly across the scene. I used the Slide on Over Waves  channel dies, but I shortened the channel by partially die cutting the length to fit the smaller area. Then I adhered my remaining images across the snowy bottom. I decided to add some glittery snowflakes and discovered that the small assortment of snowflakes in the Magic Iris Snow Globe Add On has the most perfect assortment of snowflakes using only one die and pass through the machine. 

I mounted my image panel onto some mint and navy cardstock layers using adhesive foam tape, making sure to dust the areas around the slider with my powder tool, for easy movement. Once my card was all assembled I felt like my owl was spinning all over the place, so I weighted the bottom of the image with a small metal washer and now my mail man stays upright, and slides easily across the scene. 

Thank you so much for stopping by and reading how I made this card. Make sure to play along using the beautiful January Moodboard by sharing your cards on Instagram with the hashtag #brimoodboard and don’t forget to tag the Butterfly Reflections Ink challenge account @brimoodboardchallenge so we can share your projects. One winner will be randomly selected to win $20 to the shop. 

Thank you, Davina 

Saturday, March 7, 2020

Countdown to Confetti Day #3


Hello my inky fingered friends. Today is Day 3 of the countdown to Reverse Confettis 50th Release! I have 3 cards to share with you today all featuring the incredible critter Illustrations by Dawn Machell.

I used the same color palette for all three cards,  it used variations of colors in each. For example, the pink is a different shade of pink in each card, giving each project a different feel, even though the same four colors are used. Pink, sunshine yellow, blue , and navy.

For the first card I inkblended a rosy pink onto my card panel and splattered it with water, white ink, and shimmer. I stamped my images from School Days  onto bright white Neenah Cardstock and copic colored. After cutting out with the School Days Confetti Cuts, inadded white dot highlights.

I adhered the images onto my inkblended panel then added a heat embossed banner strip. I finished it off with a sprinkling of clear iridescent sequins.

On my second card I used the new Chalk it Up stamp set and matching dies. I also used a new cover panel  die called Double Stitched Window, it reminded me of a decorative Polaroid photo, so I created a shaker card with it.

I trimmed 1/8th inch off of each of the four sides and adhered some clear acetate on the back. I framed it out with thick Tombow foam tape, and prepared my panel.

I inkblended my background in sky blues and green before splattering with the same combination as my first card. Then I stamped and copic colored all of my images. I gave a playful dotted texture to these images before highlighting and glueing down my images.

I added a generous pile of sequins to the center and mounted my “Polaroid” over top. Then I mounted the entire shaker upon some pink textured cardstock. I love that the glossy heat embossed texture is shiny right next to the reflective acetate.

On my third card, I used the new Spring Bunnies stamps and dies. I inked my sky onto the upper portion of the panel creating a crisp deep sky. I loved the sunny cloud from Chalk it Up so much, I used it here too.

I created a little butterfly catching scene and adhered it over a pink embossed banner. I used a trio of hearts from the Huggable stamp set, and used those instead of sequins. I really love this trio of cRds. I used so many of the same elements and colors and techniques. Yet achieved such different results in each card.

There will be a $15 Reverse Confetti gift certificate  for one lucky blog commenter, who hops along and comments on each Designers Countdown to Confetti Sneak Peeks. Comments will be closed on the 7th at noon with a winner announced at 5pm CST. There’s a second prize for those who comment on the Reverse Confetti FB so head on over Reverse Confetti Facebook 

Eileen Ong
Thank you for stopping by, Davina 

Friday, March 6, 2020

Countdown to Confetti Day #2


It’s day 2 of the Countdown to Confetti, and I have a new project to share with you. I feel like I checked so many boxes with this bold Easter Card, and it wasn’t intentional.

One of the great new stand alone confetti cuts this release is this incredible Diagonal Scallop Cover Plate. It’s perfect for creating backgrounds. I had planned to use the colors from the brand new March MoodBoard for this project, so when it was time to pick a color scheme, there was very little question.

 I selected a deep blue cardstock to cut my panel from, and inked around the edges with chipped sapphire distress oxide ink. It’s not overly noticeable, but I wanted the center to be slightly lighter in color. Next, I inked up some white Bristol Smooth Cardstock in shades of pink and yellow to create a soft ombré background to peek through the scallops. I splattered the panel with clean water, and white and gold ink.

I stamped the beautiful tulip flowers and vases from the new set Tulips, and colored them all in in shades of soft yellow, pinks, and blue with my copic markers. After diecutting, I added white dot highlights to my images. I mounted some of the images onto die cut fun foam to make thick, 3D like stickers. I use this technique often, I love the dimension it gives my projects.

I played with the placement of the images, and had originally planned on using one of the sentiments on a banner. But after seeing the the available space on my card front would accommodate another stand alone die, I couldn’t resist! I used the Happy Easter confetti cuts to cut out this fantastic single piece shape. I cut it from gold cardstock and from some more fun foam to balance out the card.

The scripty font is wonderful, and as I’m typing this up, I realized it’s the same font as yesterday’s Perfect Timing set. I adhered everything to my card front using simple liquid glue. Once it was all in place, I used some more of my favorite luxury matte gold sequins.

Thank you so much for dropping in. I hope you stop by again tomorrow and don’t forget the big blog hop on the 8th.

There will be a $15 Reverse Confetti gift certificate  for one lucky blog commenter, who hops along and comments on each Designers Countdown to Confetti Sneak Peeks. Comments will be closed on the 7th at noon with a winner announced at 5pm CST. There’s a second prize for those who comment on the Reverse Confetti FB so head on over Reverse Confetti Facebook 


Thank you,
Davina