Saturday, December 28, 2019

To a Cool Friend with Hello Bluebird

Hello crafty Friends, Davina here on the Butterfly Reflections Ink Blog, sharing one more project this year using the incredible December BRI Moodboard. I really enjoy using Mood/Color boards for inspiration and love how they keep my projects on track. Every month the amazing team from Butterfly Reflections Ink shares a really wonderful Moodboard, and I love to play along as much as possible.

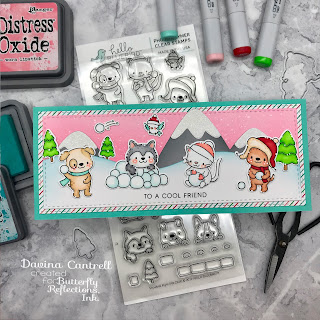
For this critter filled project, I used stamps and dies from Hello Bluebird, and slimline stitched dies from Trinity Stamps. I tossed around several ideas on how I was going to incorporate these colors without creating a Christmas card, and I’m happy to say “mission accomplished”. I used a really fun stamp set called Snowball Fight and the Coordinating dies for the stamped images, and I also used their Hill and Dales and Glacier Peaks for the background.

I started by creating a cardbase from Aqua colored cardstock. I trimmed the paper to 8.5 x 7, and scored it along the 7 inch side, at 3.5 inches. Next I used the two smaller stitched Dies in the Trinity Stamps slimline series to cut my panels. I cut one from striped patterned paper, and two with the smallest die from Bristol smooth cardstock.  I used the Hill and Dales die to cut the snowy slope by running it through my Big Shot twice while lining the die up to the previous cut line. I cut the tall mountain from the Glacier Peak set from gray cardstock and snow caps from glittery white scraps I had laying around.

I inkblended onto my remaining Bristol smooth panel using Worn Lipstick Distress Oxide Ink, making sure to graduate from darker to lighter, From bottom to top. Then I splattered with clean water, white ink, and glittery perfect pearls mist. I very gently inked some Peacock Feathers Distress Oxide Ink onto the edge of my snow, and gray Pumice Stone onto the sides of my mountains before adhering the glittery snow caps.

Next, I stamped the images onto Bright white Neenah Solar cardstock using my Stamp Platform and Lawn Fawn Jet Black Ink. Then I colored in all of the cuties with Copic Markers before die cutting and highlighting with tiny white dots (I love the snowy effect it gives). Once I had all of my images ready I put my scene together.

I used Lawn Fawn Glue Tube to attach the pink inked panel to the striped paper. Then, glueing the bottom and sides only of the snowy panel, I layered that on top. I separated the shortest hill from the mountain range and tucked them all under the snowy slope with a bit of space in between. I glued down the snowball pile first before adhering my tress. Then I was able to fill in the rest of my space with my playful characters. I finished it up by mounting the scene onto the cardbase using scor tape, then adding black glossy glaze to the eyes for a little shine.

I’m really in love with this finished wintery scene and hope that you enjoy it too. Please share your #BRImoodboard projects by tagging Butterfly Reflections Ink and using the hashtag #brimoodboard, I’d really love to see your projects.

Thank you for stopping in,
Davina

Saturday, December 14, 2019

Christmas Magic with Doodlebug Designs

Hello Friends, I have super fun Slimline Christmas card busting with oodles of Doodlebug Design Stamps and using the beautiful Butterfly Reflections Ink  December Mood Board for my color inspiration. To create this 8.5 x 3.5 beauty I used supplies from several brands available on the BRI website; Trinity Stamps, Doodlebug DesignsPretty Pink Posh, and some little tabs from Mama Elephant.

This large card required a little planning on my part. I knew I was going to use the gorgeous colors from the December Mood Board, so I chose a couple of stamp and die sets from Doodlebug Design Stamps called Christmas Magic and Santa’s Sweets that I thought would look great. I knew knew I should have ordered the coordinating pattern papers in the large 12 x 12 size, but I didn’t, I ordered the 6 x 6 and it obviously was too small to create my slimline scene. So I choose a piece of pink paper from my stash and used the largest scalloped die from the Trinity Stamps Slimline series to cut my cardface. I layered this over a piece of textured heavy white cardstock trimmed to 8.25 x 3.5. Then I used the smallest stitched panel from the Slimline series to cut a piece of Bristol Smooth cardstock.

I used Spun Sugar and Worn Lipstick to gently ink some pink on to the sides and top portion of the panel. Then I splattered with sparkly Perfect Pearls, and white ink. Then I used this  Snowflake Stencil from Mama Elephant, and glitter paste, to emboss the snowflake images onto my inked panel.
While that dried, I stamped the images from both stamps sets with black ink and my stamp platform, and got to work coloring. I chose 3 copics from each color on the Moodboard (not including skin and hair colors) and colored all of the images. Then I used the coordinating dies to cut out all of the images before highlighting. I’ve been using thinned acrylic paint and a dotting tool to highlight my images lately instead of a white gel pen, and have really been enjoying the results.

I added some sparkly Crystal Clear Spectrum Noir to some of the images, as well as clear glaze dots onto the eyes and buttons. Then I layered all of the images from the Santa’s Sweets set onto the cover. I added a flag banner with the sentiment to the upper corner with foam tape.

Next I got to work on the inner portion. I used the remaining part of the patterned 12 x 12 paper and scored it in half with the right side in. Then I trimmed it to 1/4 inch smaller than the cardbase. I nestled it into my true cardbase to check the size, and made another little trimming to the paper to get a nice 1/8 inch layer when opened. I cut and inked a second stitched layer to fit on the upper portion of the inked paper insert.

I used Mama Elephant Pop Up Trio dies to cut the little tabs onto the insert before I attached anything together. Once cut, I glued the inked panel to the pink paper, then attached the insert, one half at a time, to the cardbase. I cut the curved banner from the same Trinity Slimline Series die set, and stamped a sentiment onto it, before attaching the banner to the pop up tabs. Then I adhered my remaining images to the panel. I decided to attach Santa and the little girl to the back of the banner so the would be the popped up images. I’m so surprised at how flat this hefty card turned out compared to some of my other scenes. And I love the results with the pop up layers! I hope you do too

Thank you for stopping by and I hope that you use some of your crafty time this month a create something using the Mood Board. Please use the hashtag #brimoodboard so we can find your project and give some ❤️
Davina

Thursday, December 12, 2019

Winter Wishes with Heffy Doodle

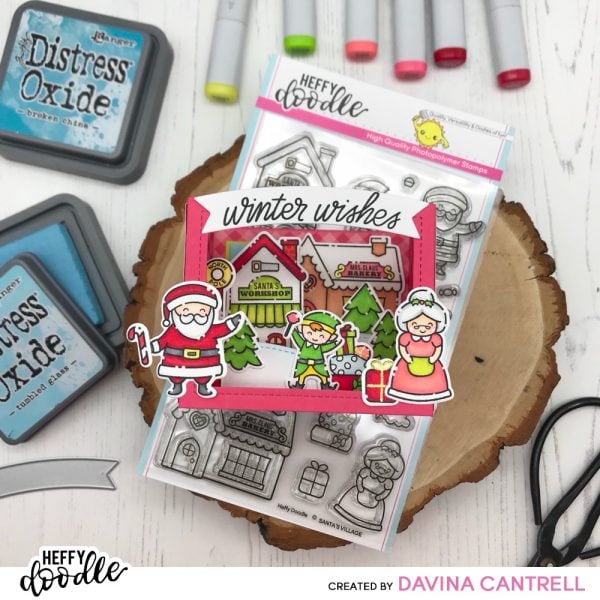
 Hello Crafty Friends, Davina here to share another Interactive card with you using adorable Heffy Doodle stamps! Today I’m sharing a small shadow box filled with everybody’s favorite North Pole inhabitants. I’ve used the super cute images from Santa’s Village  like Santa and Mrs. Claus, a little elf, and the workshop. I love making little shadow boxes like this that I can fill to the brim with lots of images and patterned paper. And I love that they fit into regular mailing envelopes and don’t require extra postage. For this little cutie I used a die set from Lawn Fawn to cut the paper panels to build the card, but often I make my own larger, custom sized shadow box that I will share with you at a later date.
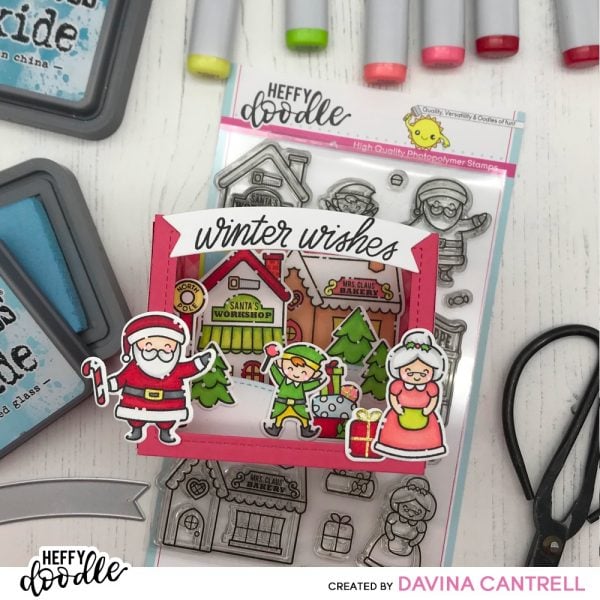
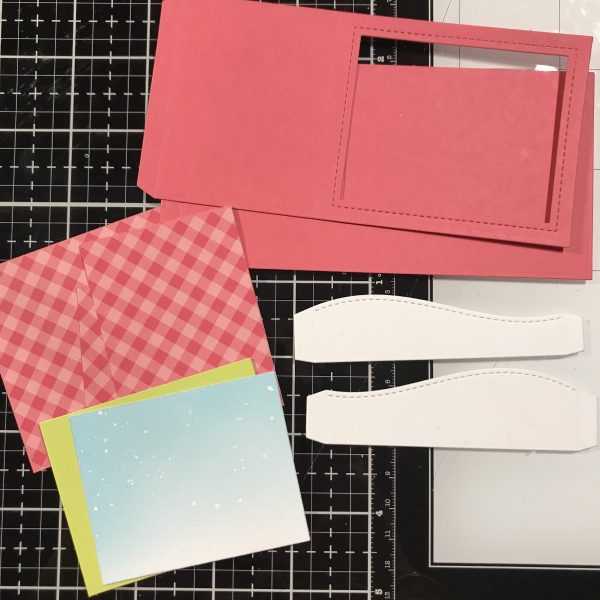
I cut two panels from a watermelon pink/red cardstock that I have in my stash for the base of the shadow box. Then I trimmed some patterned paper that I had, that was almost the same color, to fit just inside each panel. I loved the tone on tone gingham print that doesn't distract from my images. I inked a small panel with tumbled glass Distress Oxide Inks and splattered it with shimmery perfect petals and white ink to give a wintery snowy sky, and also splattered some snowy slopes that I also cut from white paper.
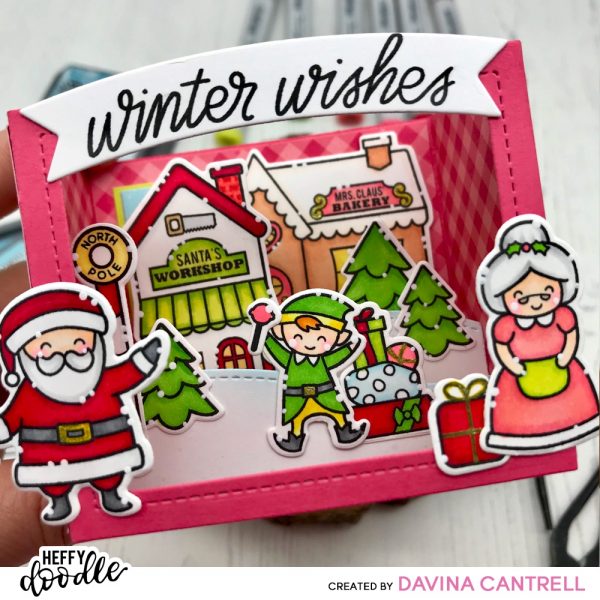
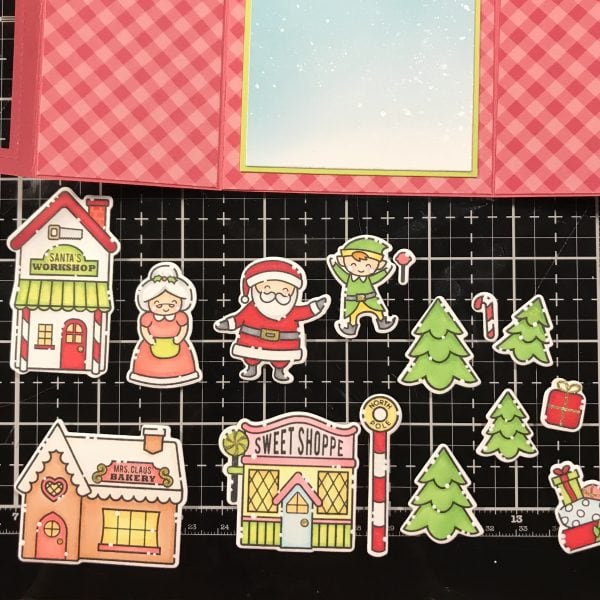
I stamped out my images using black ink and my stamp platform, making sure to get the best impression possible. Then I chose a bright color palette and colored with Copic markers. Next I cut out my images using the coordinating Santa’s Village Dies. Once my images were all cut out I used a dotting tool and thinned white acrylic paint to add the little dotted details around my images (I’m currently on strike from my white gel pen). I then played around with placement before adhereing any images.
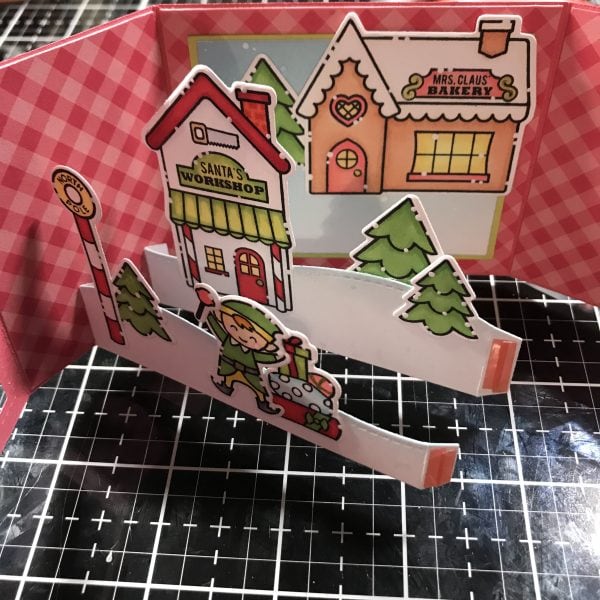
I started by attaching my two panels with double sided sticky tape. I was frustrated to find out that I was out of the 1/4 inch size, and had to use two layers of 1/8 inch... but at least I had that on hand. Then I used liquid glue to add the gingham paper to each interior side. I mounted my inked piece of sky onto a lime green piece of cardstock before glueing it onto the back. Next, I glued down a large pine tree and Mrs. Clauses bakery on the back sky layer close to the top. On my larger snow slope I attached Santa’s workshop, and a pair of trees, making sure to add one tree from behind for visual interest. Finally on my shorter slop I layered in my elf and a pile of gifts and the North Pole  making sure they were arranged nicely when layered over the other panels.  After scoring the tabs and applying double sided tape to each side, I attached the left sides of the snow slopes, about 3/4 of an inch from each other, on the left side of the box. Next I opened the box and laid the slopes down, making sure they were straight along the bottom, before removing the plastic liner and folding the right side down for a perfect fit. Once both sides were attached, I folded the box to each side and rubbed carefully to make sure the glue was nice and secure.
To complete the box, I secured the front panel to the final tab with double sided sticky tape and rubbed it well to secure it. I added Mr. & Mrs. Claus to the very front towards the bottom, and created a banner, cut from the die set Tag Along Dies and some scripty words from Wanna Build a Snowman. They fit perfectly on top of my shadow box and really bring it all together. To finish it all up I glued the patterned paper all around the outside of the box too, but I used the reversed side which is very subtle and I made a white panel on the back to sign when I gift this to someone. I hope you enjoy this little box of fun and appreciate you stopping by,
Davina @popsiclesticks please visit my instagram for more fun inspiration