Showing posts with label mermaid. Show all posts

Sunday, April 14, 2024

The Greeting Farm April Blog Hop


The April 2024 New Release is now available for purchase in The Greeting Farm Store. This month we introduced 3 new stamp sets. Our first set called MERMAID ANYA 2 takes us under the sea with a gorgeous Anya and her fish and sea horse friends. Next, our furry friends went on a road trip in a caravan in a set called ADVENTURE PALS. Our final set called MISS ANYA STYLE has a beautiful Anya with 4 stunning dresses.


I’m sharing a shaker card I made using the beautiful Mermaid Anya 2 stamp set. I just adore how her hair flows across her face and large coral and starfish fascinator. I combined a few images from an older set called Happy to Sea You. I adhered everything on top of a scallop scale shaker that I’ve had in my stash for years and years and I like how the beachy patterned paper peeks through from behind.


To celebrate this release we are having a short BLOG HOP! One lucky fan will take home the entire release!! You have until April 18th, 12pm CST/1pm EST to leave your comments on each Designer's Blog. Then head back to The Greeting Farm Blog to let us know you completed the hop.

**Remember to qualify for the prize you MUST leave a comment on each Designer's Blog AND The Greeting Farm Blog letting us know you completed the hop.

NOTE: Comments on The Greeting Farm Blog are admin approved so it may take a day for your comment to be visible. Please only comment once, and use the same name on all the blogs when leaving a comment. Do not pick the Anonymous option (otherwise we won't be able to verify that it's you).

We will announce the random winner later in the week on the Blog and in our Facebook Group: The Greeting Farm Fan Page.

TGF Design Team:
Cynthia
Davina
Elisabete
Meg

This is a short hop and definitely worth playing along! If you want to grab your favorites now, you can purchase the new stamps HERE. We will have more cards featuring the New Release from our Design Team Leaders starting on the 16th so be sure to stop by The Greeting Farm Blog to see more inspiration.

Happy Hopping!

Monday, July 13, 2020

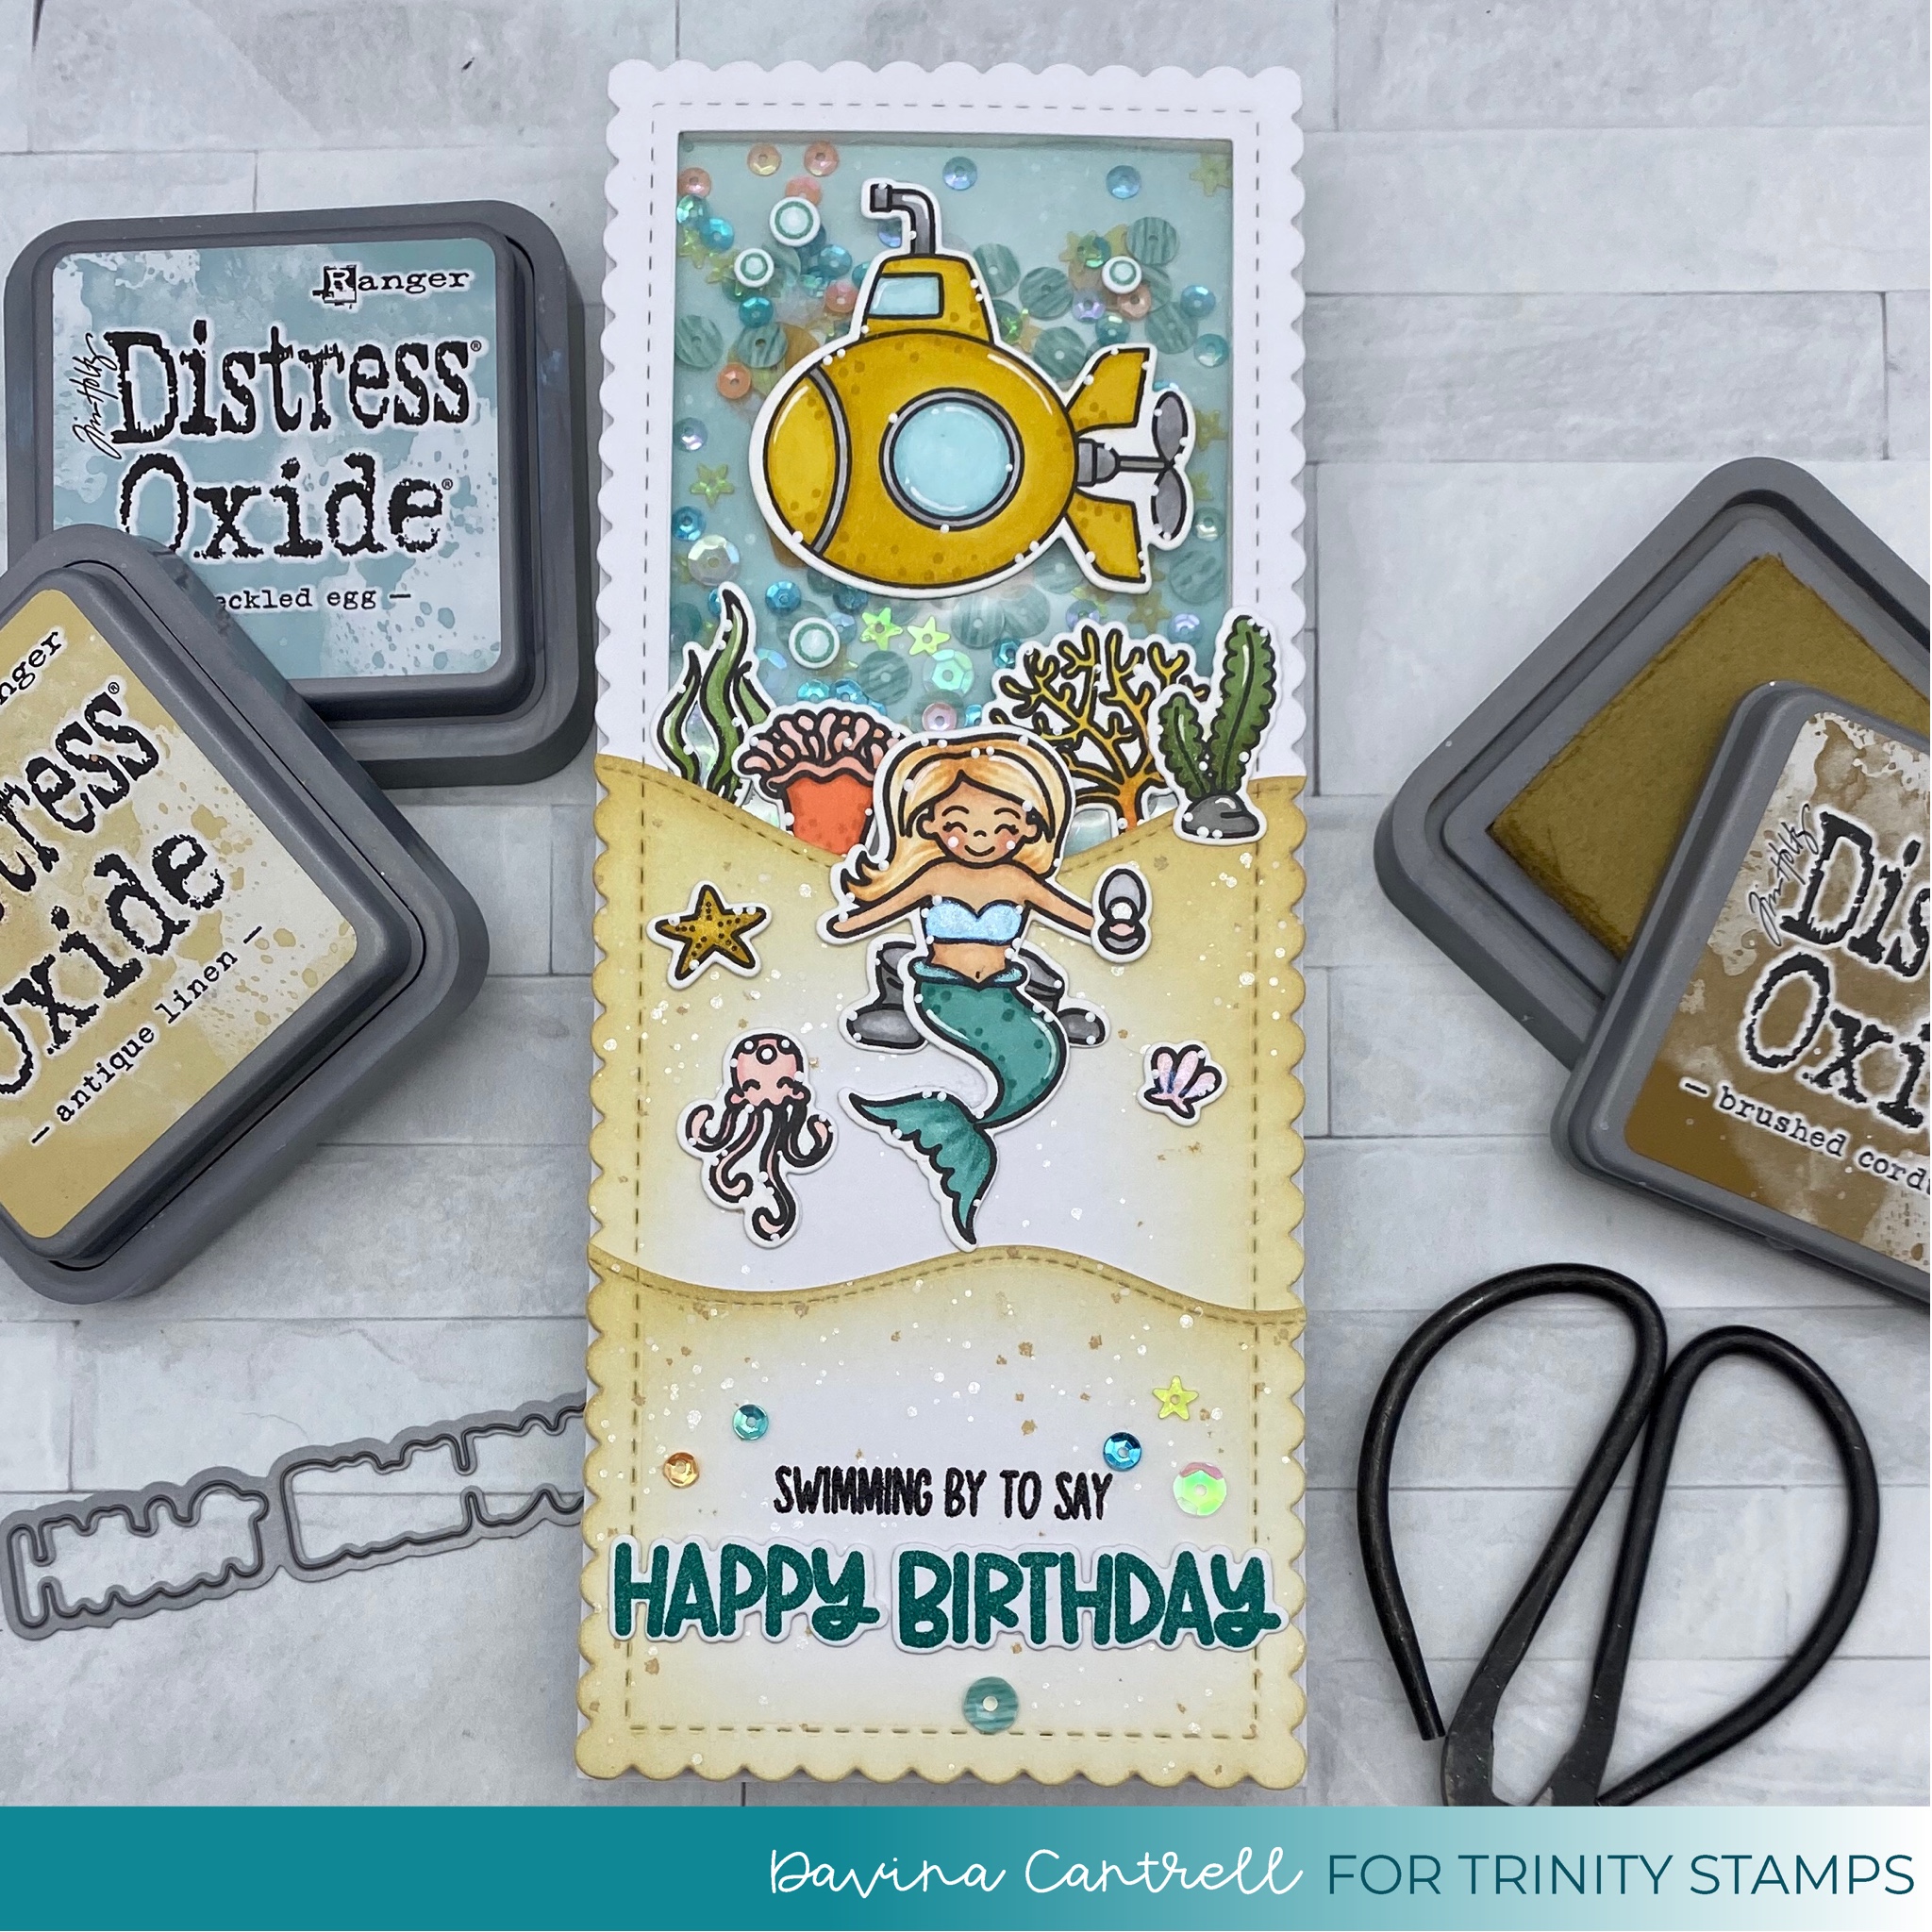
Submarine shaker card with Trinity Stamps

Hello crafty friends! Today I have a little under the sea, submarine shaker card to share with you. I used all Trinity Stamps products to create this slimline shaker and the results were so much fun. 


I used the Scallop Card Panels to cut two large pieces from bright white cardstock. I also used the Large Stitched Frame from the Slimline Frame and Fold Die set to cut out the inner & upper portion of one panel. This will be where all the shaker action will take place. On my second panel I cut a hill that will cover the very bottom of the window, and then I cut a second hill from the remaining paper for a layered sandy hill. I gently inked the hills using Antique Linen and Brushed Corduroy distress oxide inks, leaving plenty of white showing. After splattering with brown ink, white ink, and glittery perfect pearls I put aside to dry. I cut a piece of cardstock to fit under the scallop frame without showing, and inked the upper area with Speckled Egg Distress Oxide ink, also leaving plenty of white, and splattered with white ink and perfect pearls. 

I colored a couple of submarine images during the week, so I wanted to use the sub in the watery shaker area, and I stamped and colored a mermaid and plenty of coral from the sets Mermaid Wishes And Ocean Reef Builder. I colored these up and added some glittery wink of Stella to some of the images after diecutting using the coordinating dies.  

I used liquid glue to layer all of the scallop layers together, and stamped my sentiment at the bottom. I heat embossed the smaller words, but stamped with colored ink and die cut the Happy Birthday from the Ocean Reef Builder set. I used a variety of adhesives to attach my images before creating the shaker.

I cut a bright white panel to 3.5x8.5 And glued my smaller inkblended panel in the center. I liberally applied powder with my powder tool to the blue inked portion, and added a heaping tablespoon of sequins mix. On the back of my scallop frame, I adhered an acetate sheet with score tape, then framed out the window with trimmed Tombow foam tape. It is thicker than Scotch brand, so I had no need to double it up. I framed the rest of the card panel with foam tape and applied it over my blue panel and sequins. Then I mounted it all onto my cardbase. Finally, I finished up this card by applying a variety of sequins that are included in the mix I used inside the shaker. I think the little starfish are my favorite. This was one of my favorite shakers that I have made, I think the Tombow tape really made a difference in easels thickness for the sequins and application. 

Thanks for stopping by, Davina