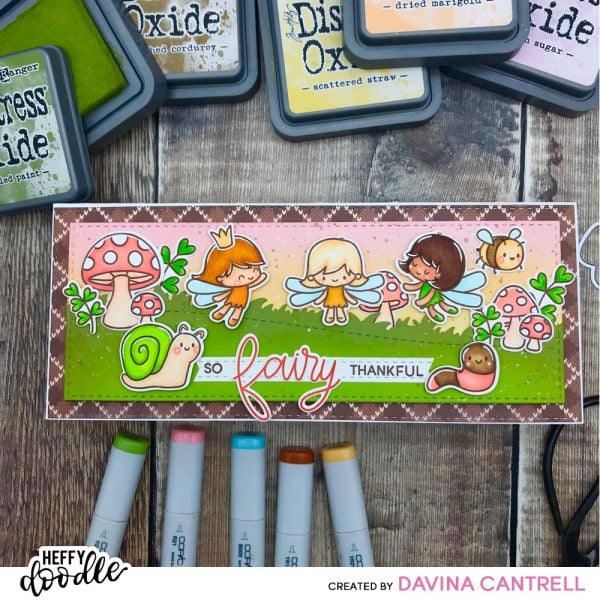
Hello Crafty Friends, Davina here with my very first blog post for Heffy Doodle . I’m so happy and proud to be a new member of the Heffy Doodle Design Team. You may be familiar with me as @popsiclesticks on Instagram, and if not, I hope you head over and check out my account. Today I’m sharing a Thankful fall inspired slimline card, that I hope you love.
Slimline cards are a non traditional style of cards that I really enjoy making. I have seen several different sizes and styles but the size I prefer is 8.5 x 3.5 This unique size allows me to make a cardbase, and use the remaining cardstock to create my image panel from a piece of standard 8.5 x 11 heavyweight paper. I begin by trimming off 4 inches from the 11 inch length of the paper, then scoring the remaining 7 inches down the center at 3.5 inches. I fold along the score line, then use my bone folder, and my cardbase is ready for later use.
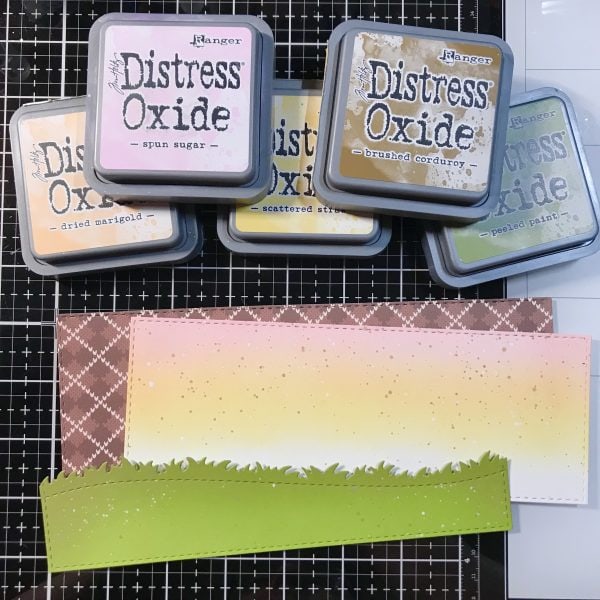
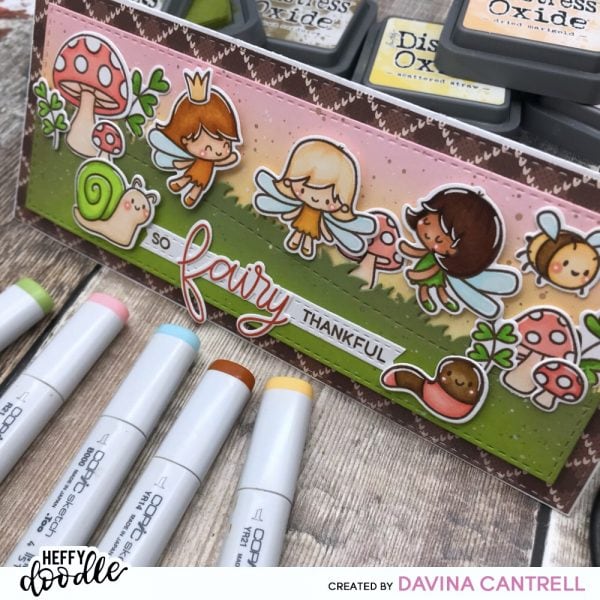
For this card I wanted a fall patterned paper base. I used some Stictched Slimline Dies (available from Trinity Stamps) to cut a perfect stitched panel from brown patterned paper. Then I used a smaller stitched die layer to run my remaining white cardstock through the big shot to build my scene upon. I wanted a soft pink sky so I chose my favorite combination of Distress Oxide Inks in Scattered Straw, Dried Marigold, and Spun Sugar. I inkblended my sky and placed it to the side. I cut a piece of green cardstock with the same smaller die layer, then cut a sloped grassy hillside down the middle. I will save the unused portion for a later project. I used some Peeled Paint and Brushed Corduroy Oxide Ink to blend onto the grassy edges to create some interest and add visual dimension. I really love this effect on colored cardstock. Once finished, I splattered both the green layer and the pink sky layer with brown diluted ink and white opaque ink.
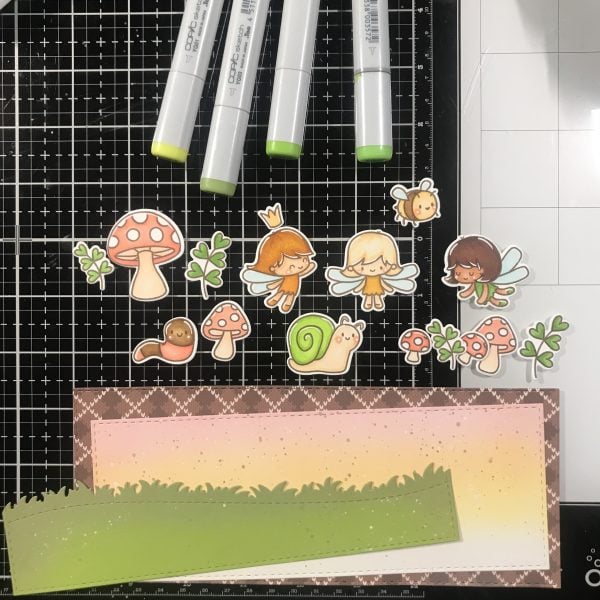
I used my stamp platform and brown Momento Ink to stamp images from several adorable Heffy Doodle Sets onto Smooth white card. The stamps sets I used are Absotoothly Awesome , Big Bug Hugs, and Gnome Matter What. I used a variety of Copic Markers to color up my images in shades of coral, pink, brown, green, and orange. I really love the soft look the brown ink gives with the limited color palette. I die cut the images with the coordinating dies, then highlighted with white gel pen.
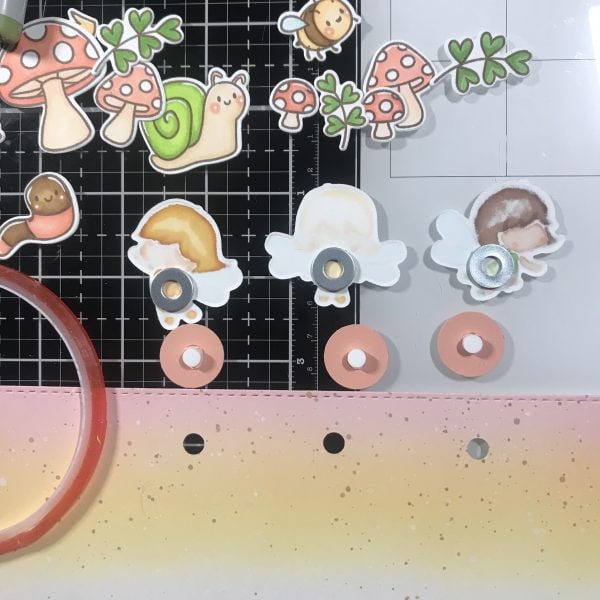
I played with the placement of the images on my panels, before deciding to make my Fairies dance in the sky. I marked the placement lightly with pencil before I created simple swinging elements using a standard hole punch, slider discs, and small washers. Normally I would se a penny to weigh down the bottom of the images to swing easily, but the little legs were small so I used some small metal washers that we had at home, and attached them to my images with 1/8 inch double stick tape. I punched 6 3/4 inch circles from scrap card ( glueing two pieces together with liquid glue to create 3 circles) and attached a slider disc to each circle. I used the hole punch to cut out 3 holes from the sky and got to work creating the rest of my scene. Using a variety of adhesives I attached the remaining images to my panel, and the sentiment banner that I made using the Strips of Ease die cuts.
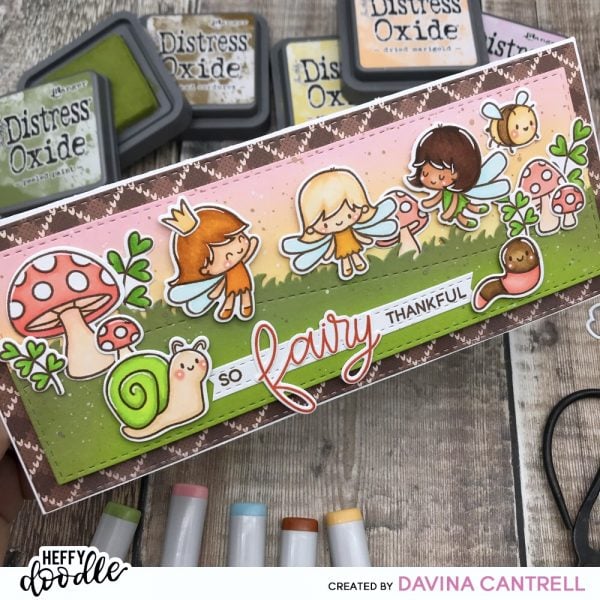
I fed the slider discs through the holes and attached the fairies. Next, I flipped over the panel and added a layer of foam tape all the way around making sure the sliding circles weren’t impeded. I removed the backing paper and attached it to the brown patterned paper. Finally I used scor tape to attach the entire thing to my premade cardbase. I love the finished results and really enjoy playing with the card and making the Fairies swing back and forth. This is an idea you could easily whip up without having to purchase expensive interactive Dies. I hope you try it out and thank you for stopping by,
Davina
No comments:
Post a Comment